Lenovo Tab3 7 Essential 2017
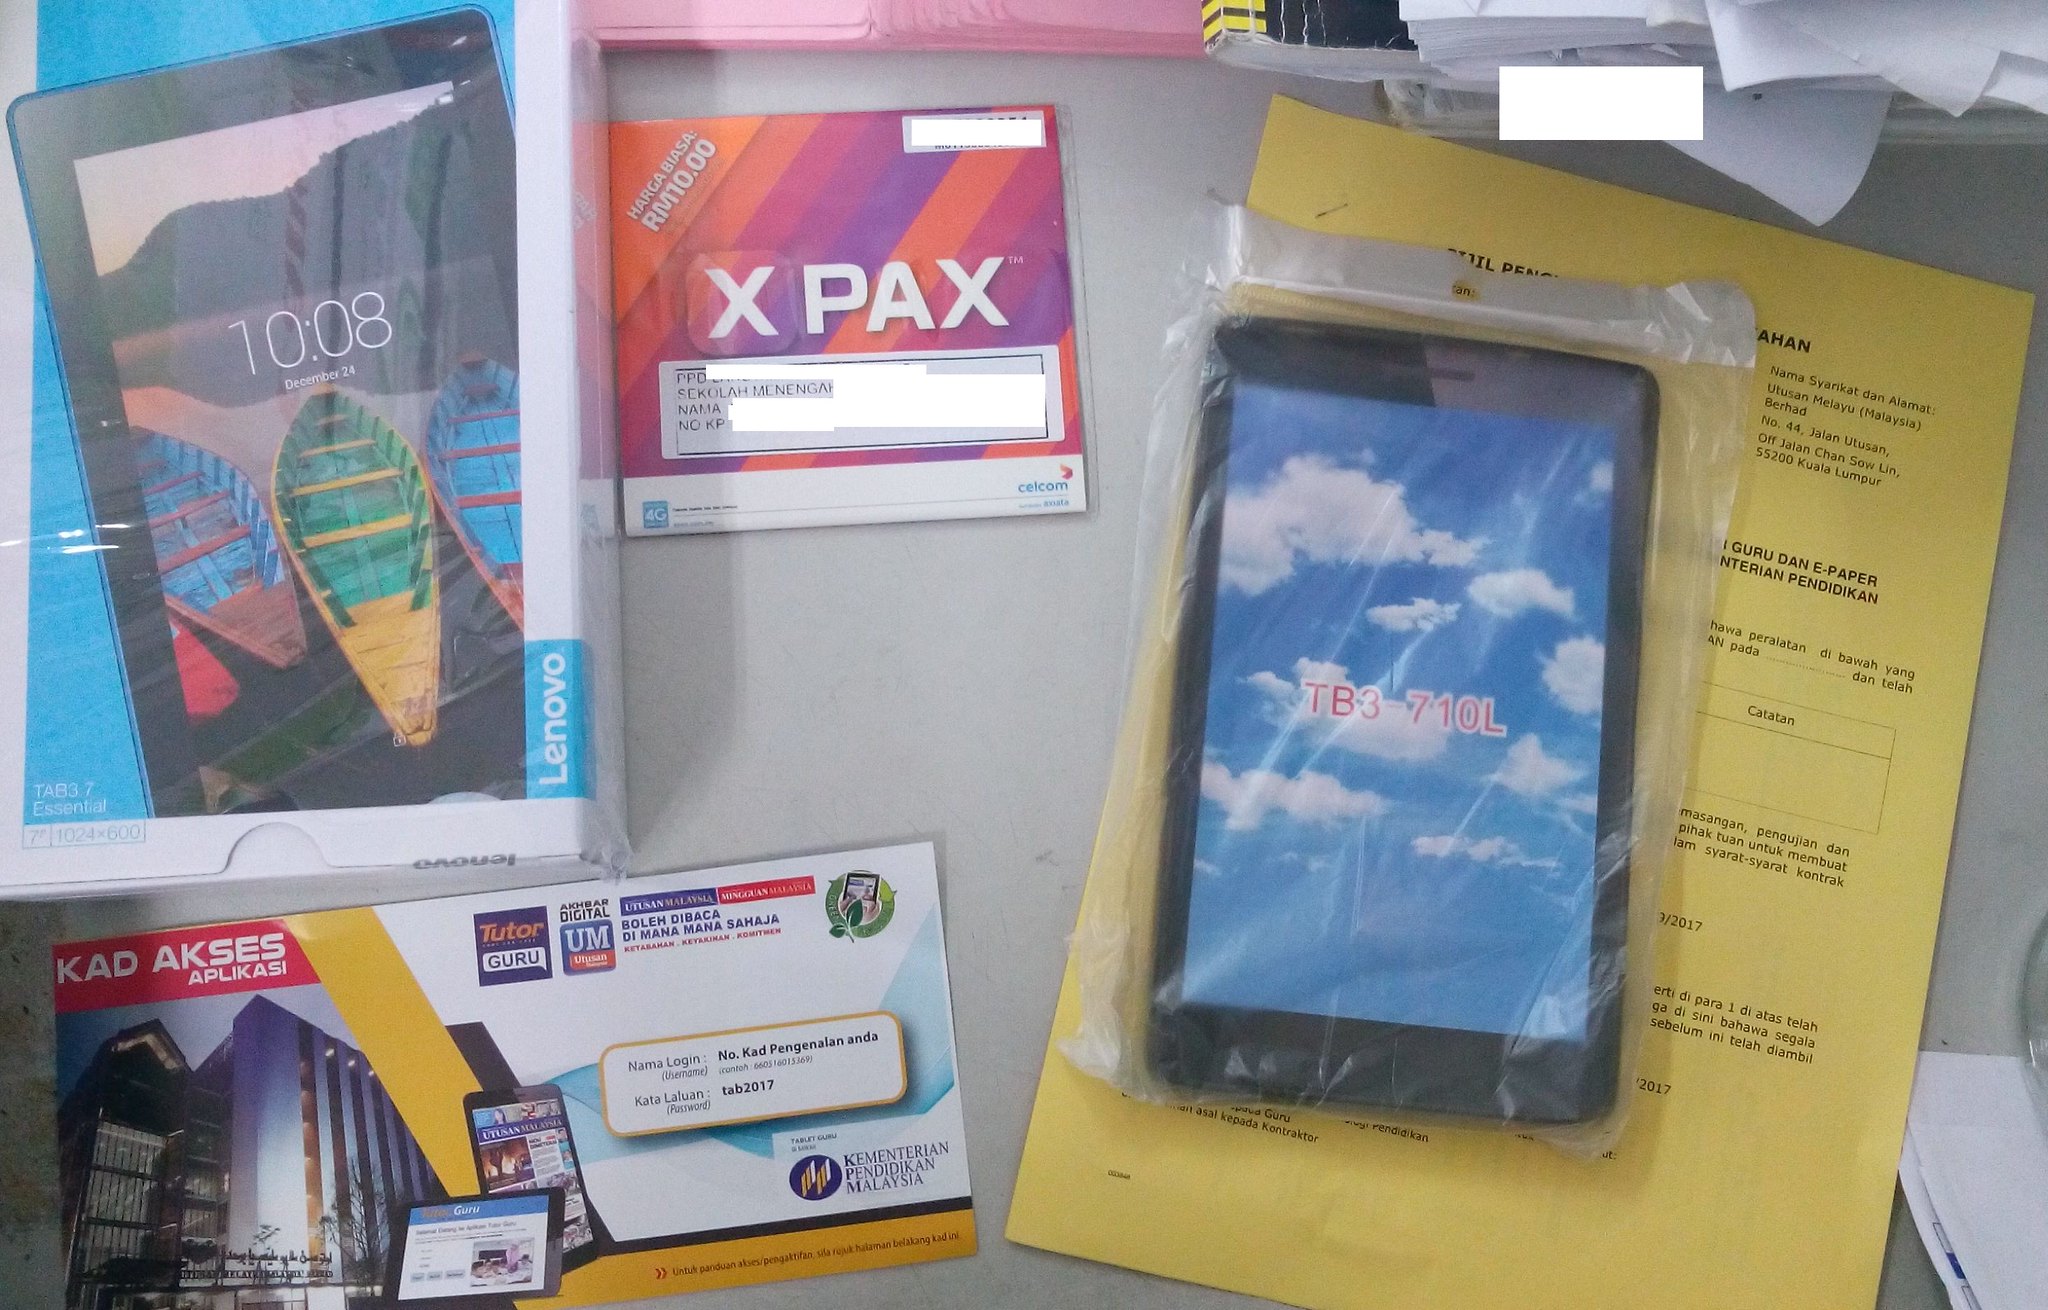 |
| 1.All things given. |
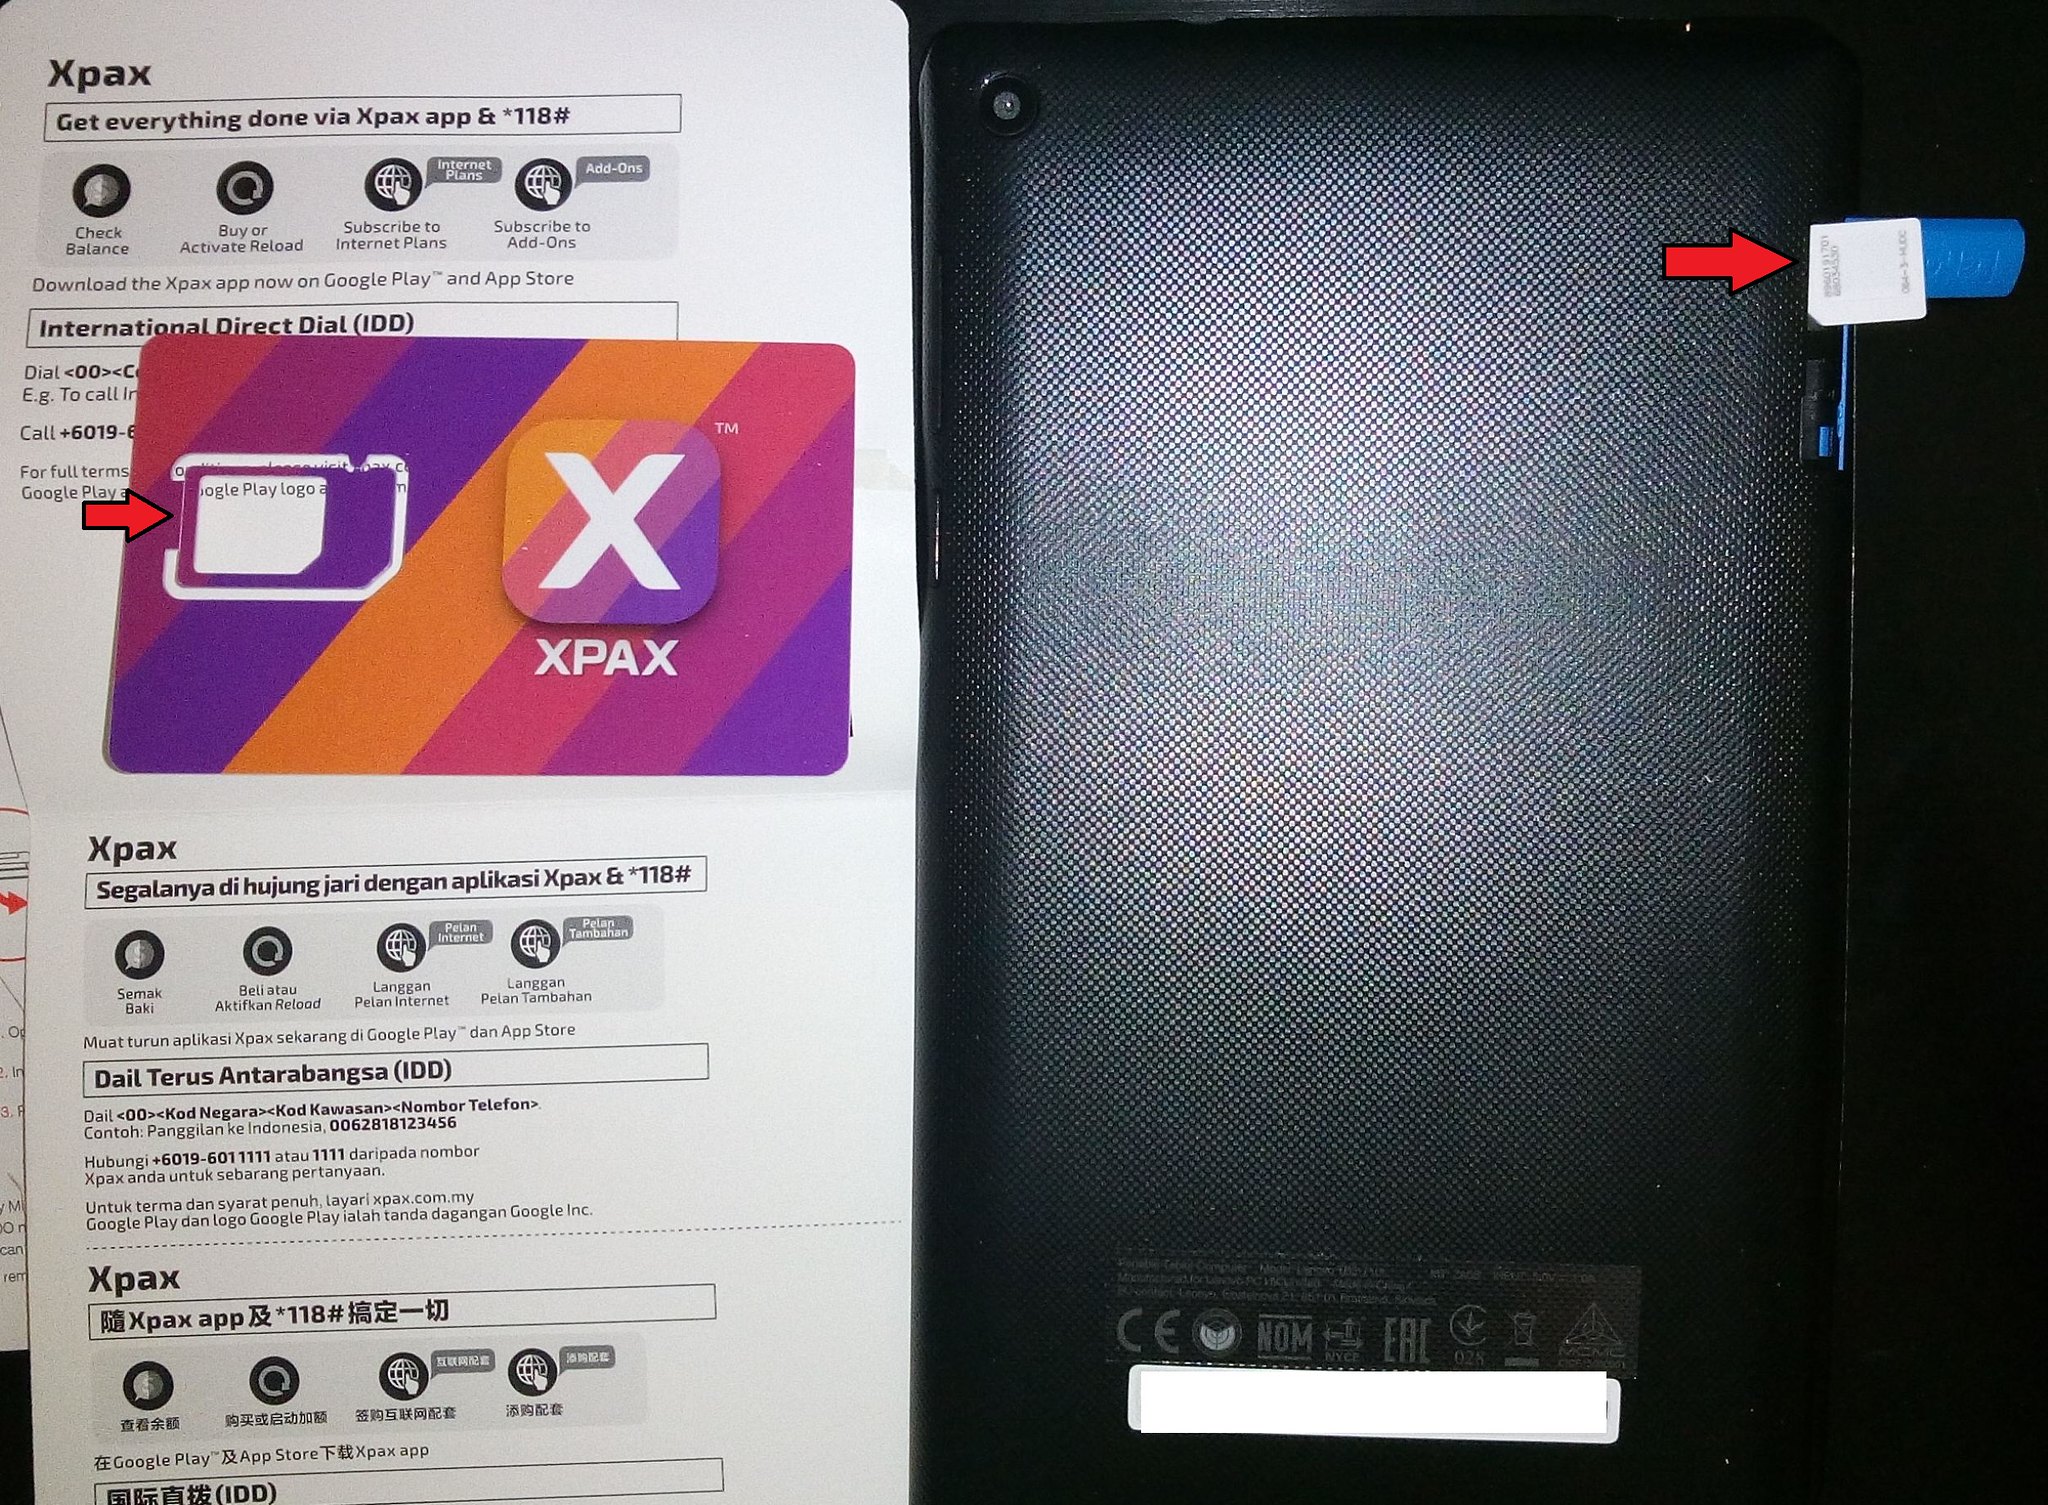 |
| 2.Slot in the given sim card according the size. Follow the red arrow. |
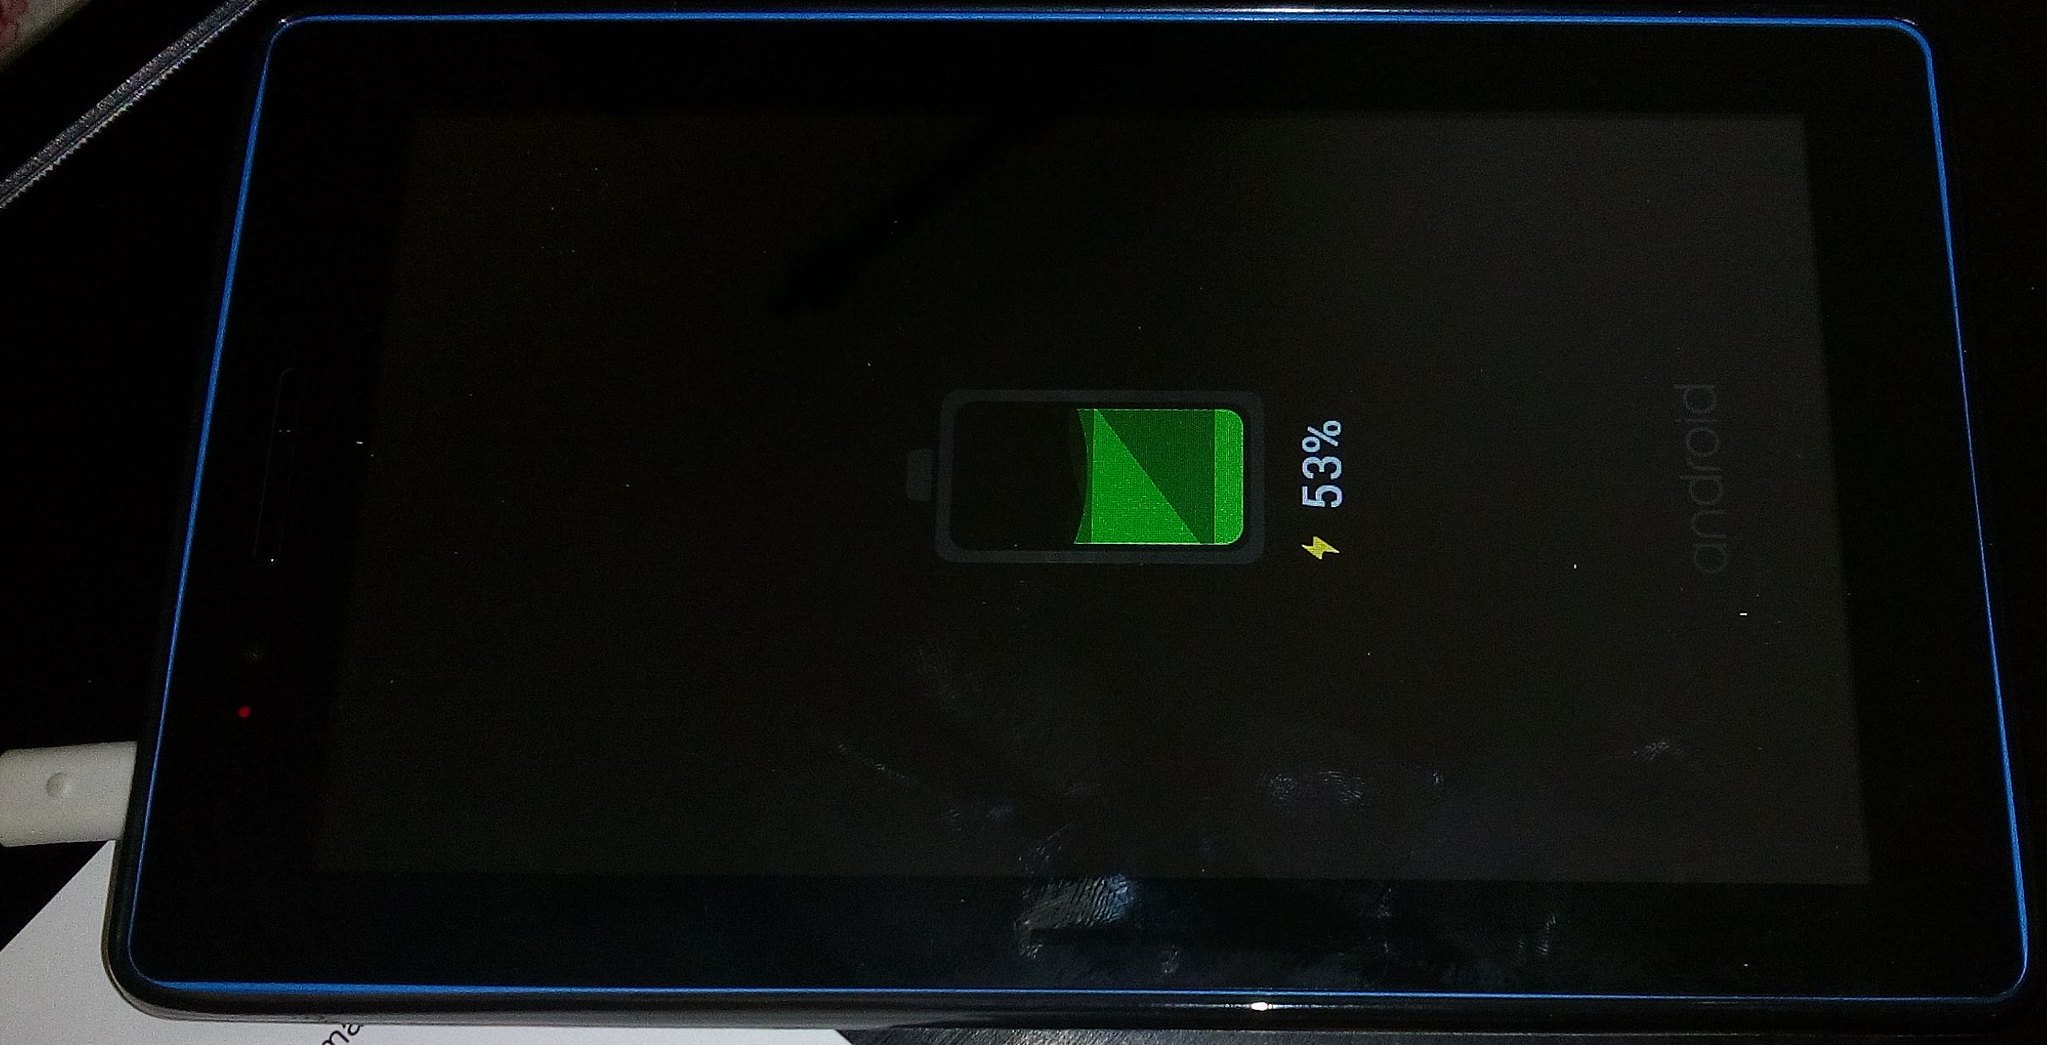 |
| 3.Charge first. |
 |
| 4.Power On |
 |
| 4.Power On |
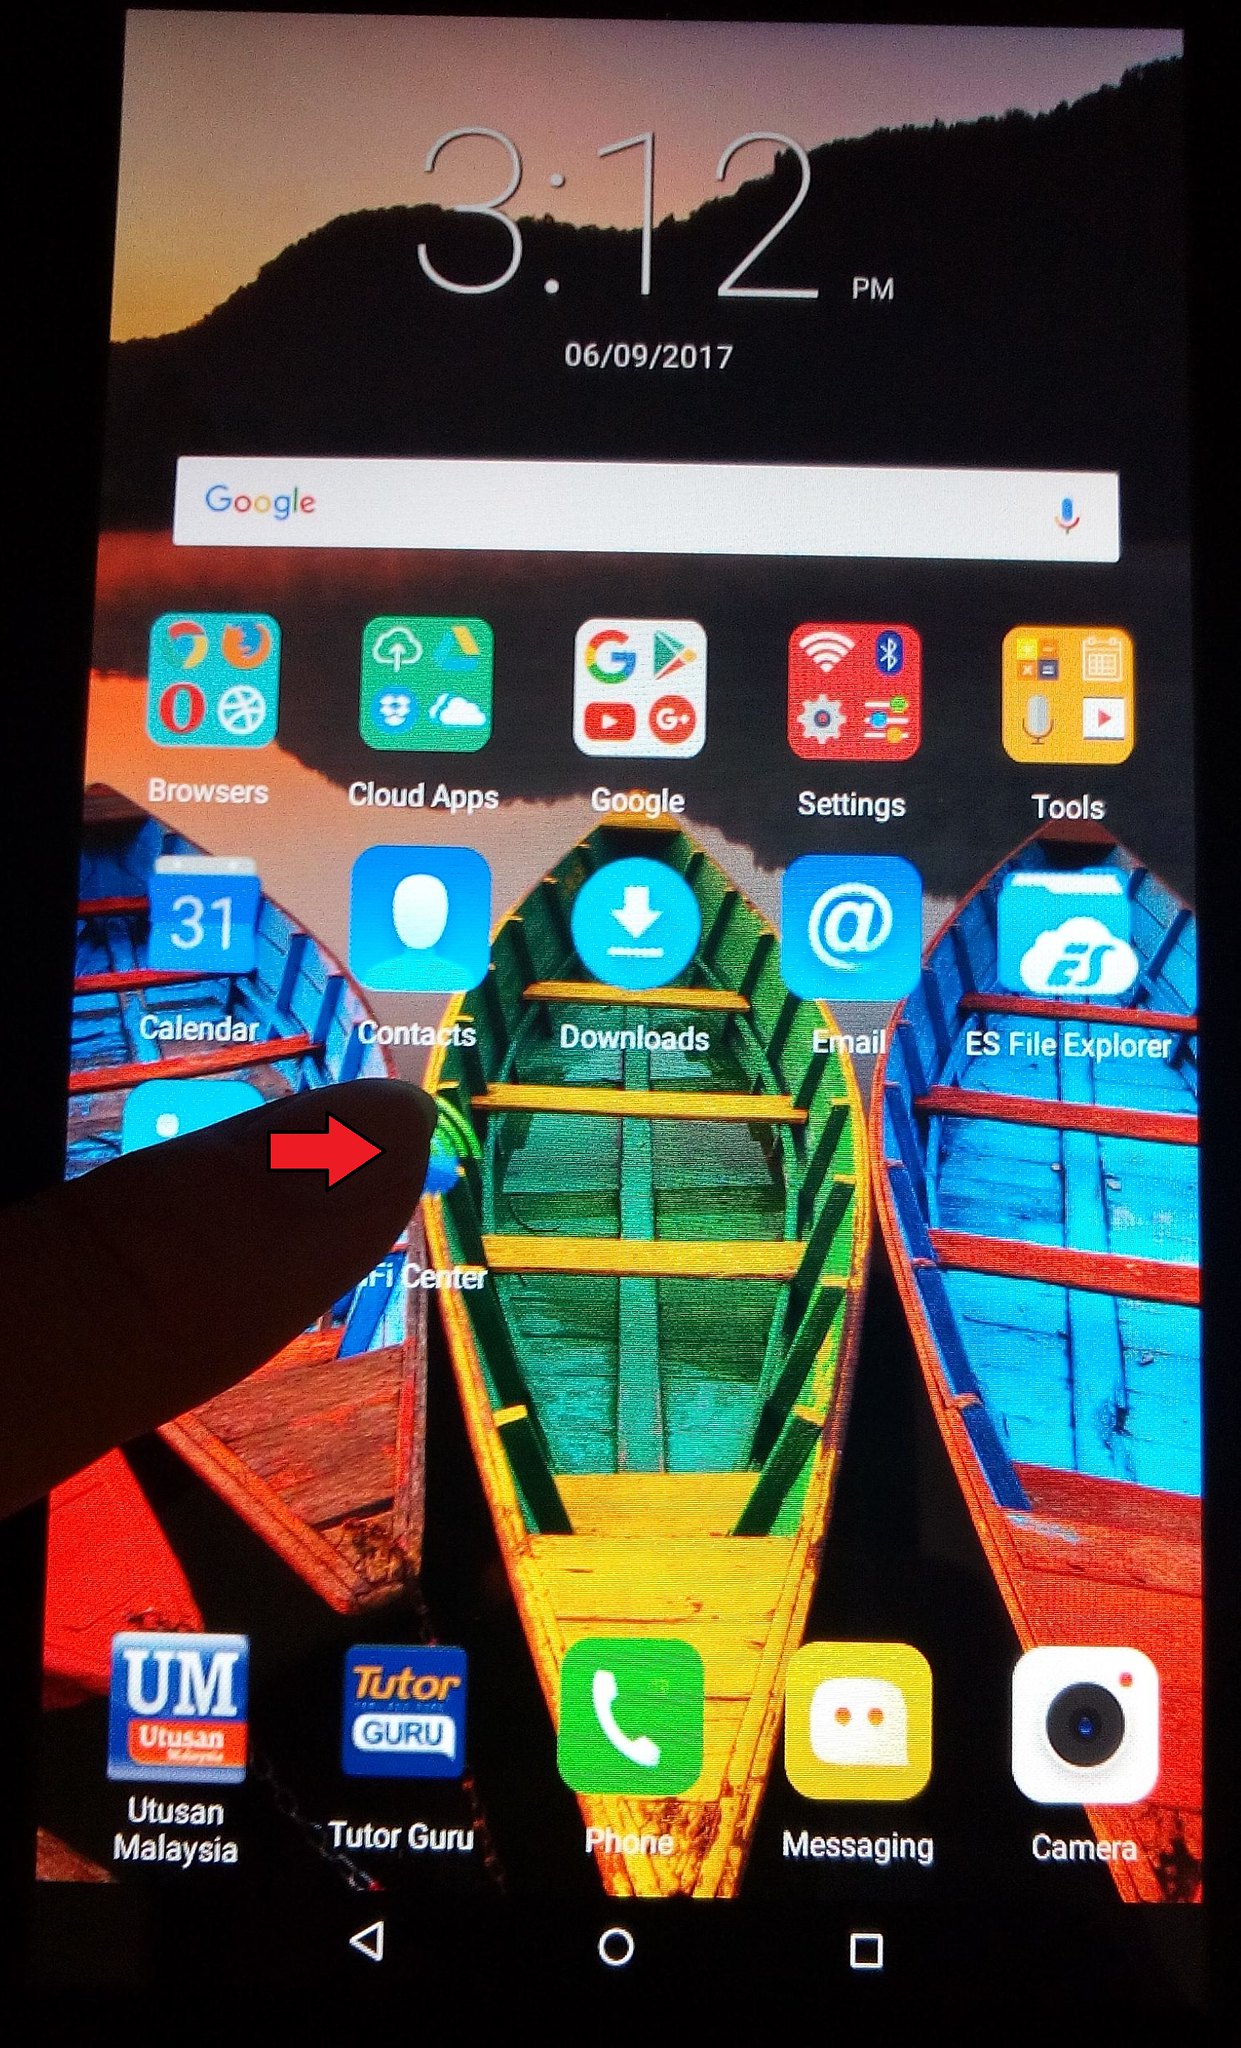 |
| 5.Click Wifi Centre |
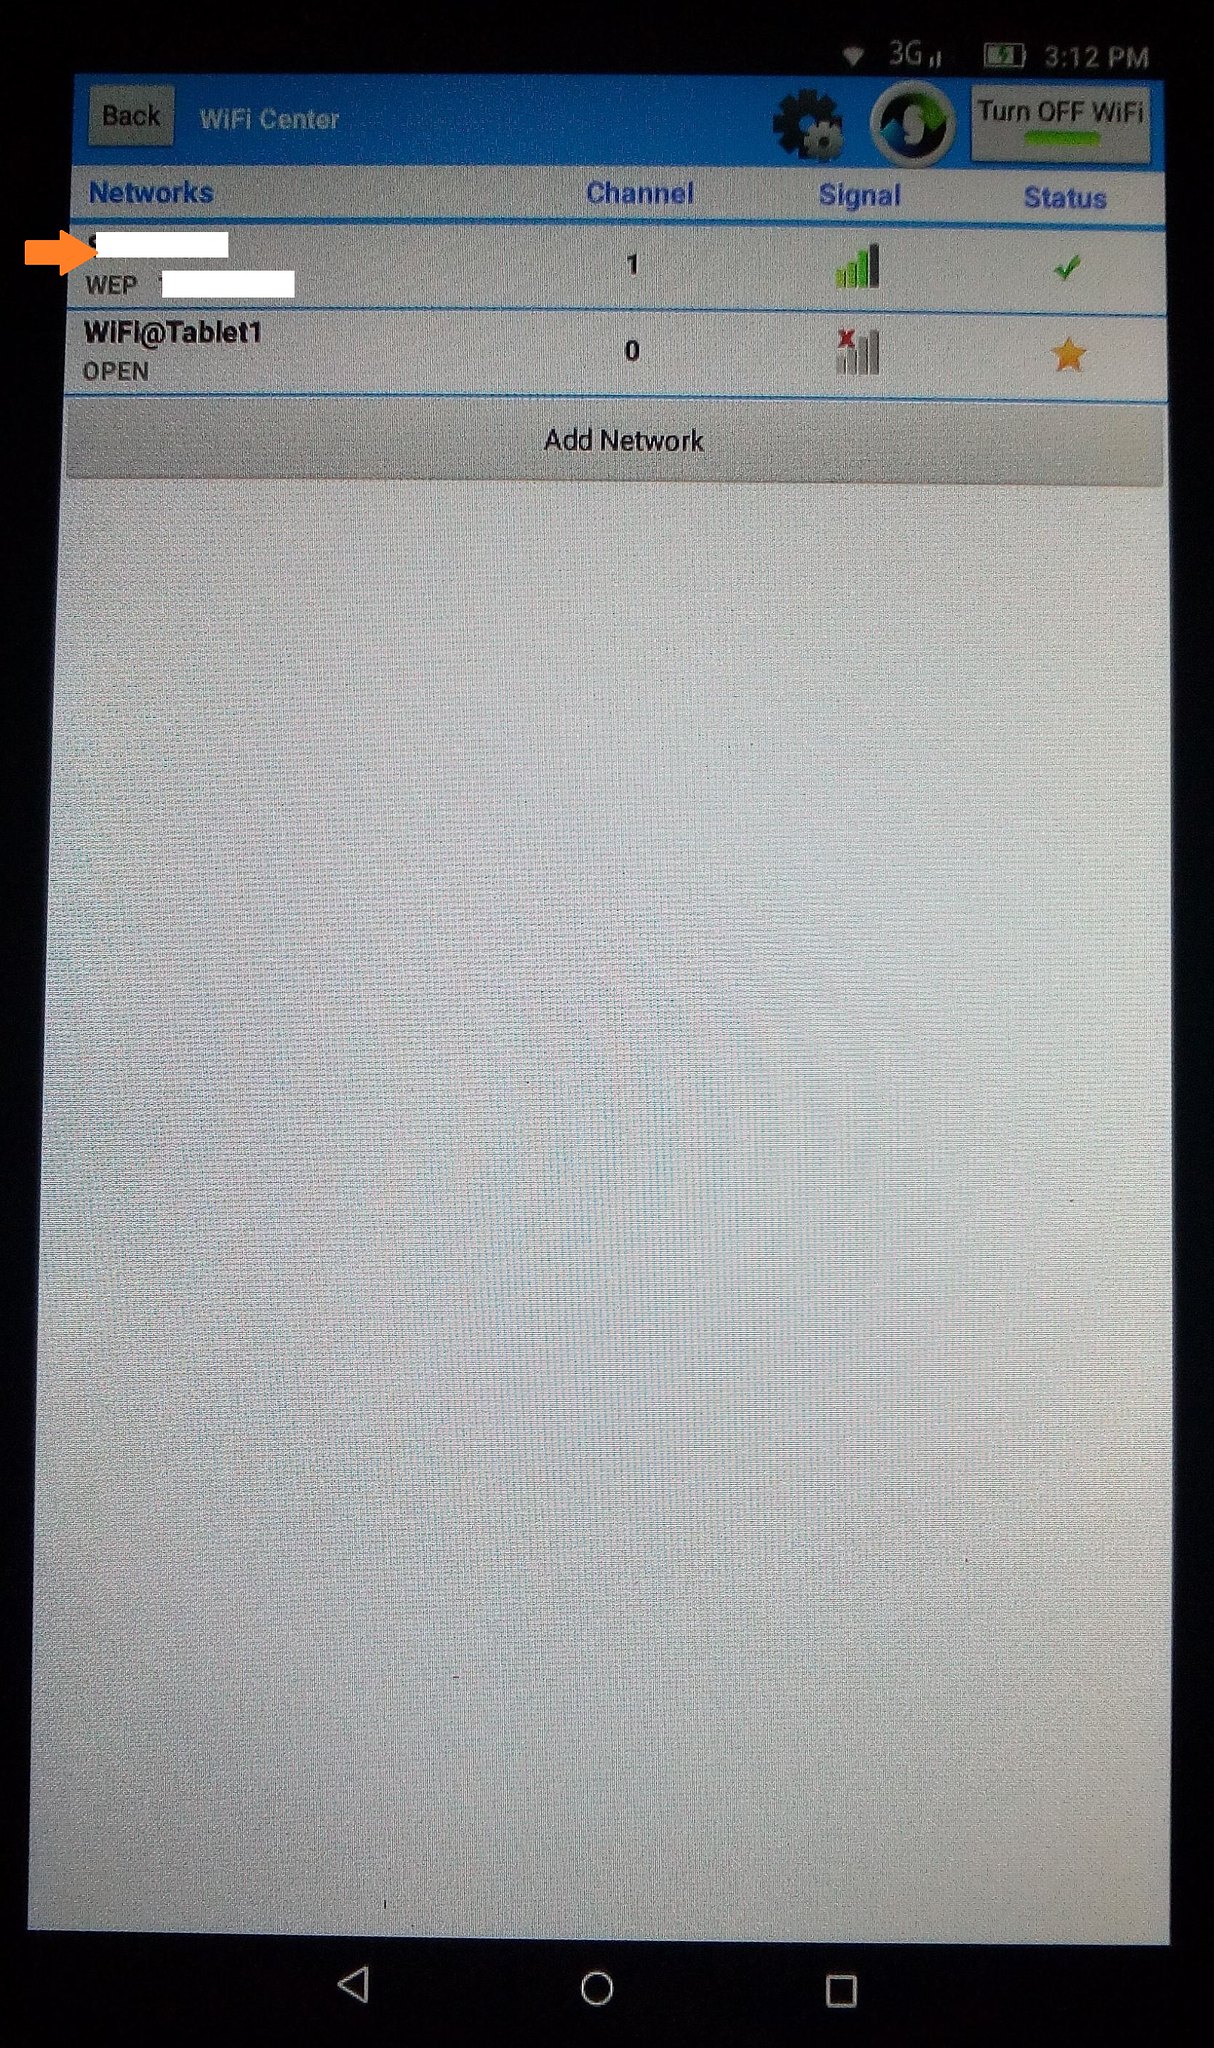 |
| 6.Click your wifi subscribtion |
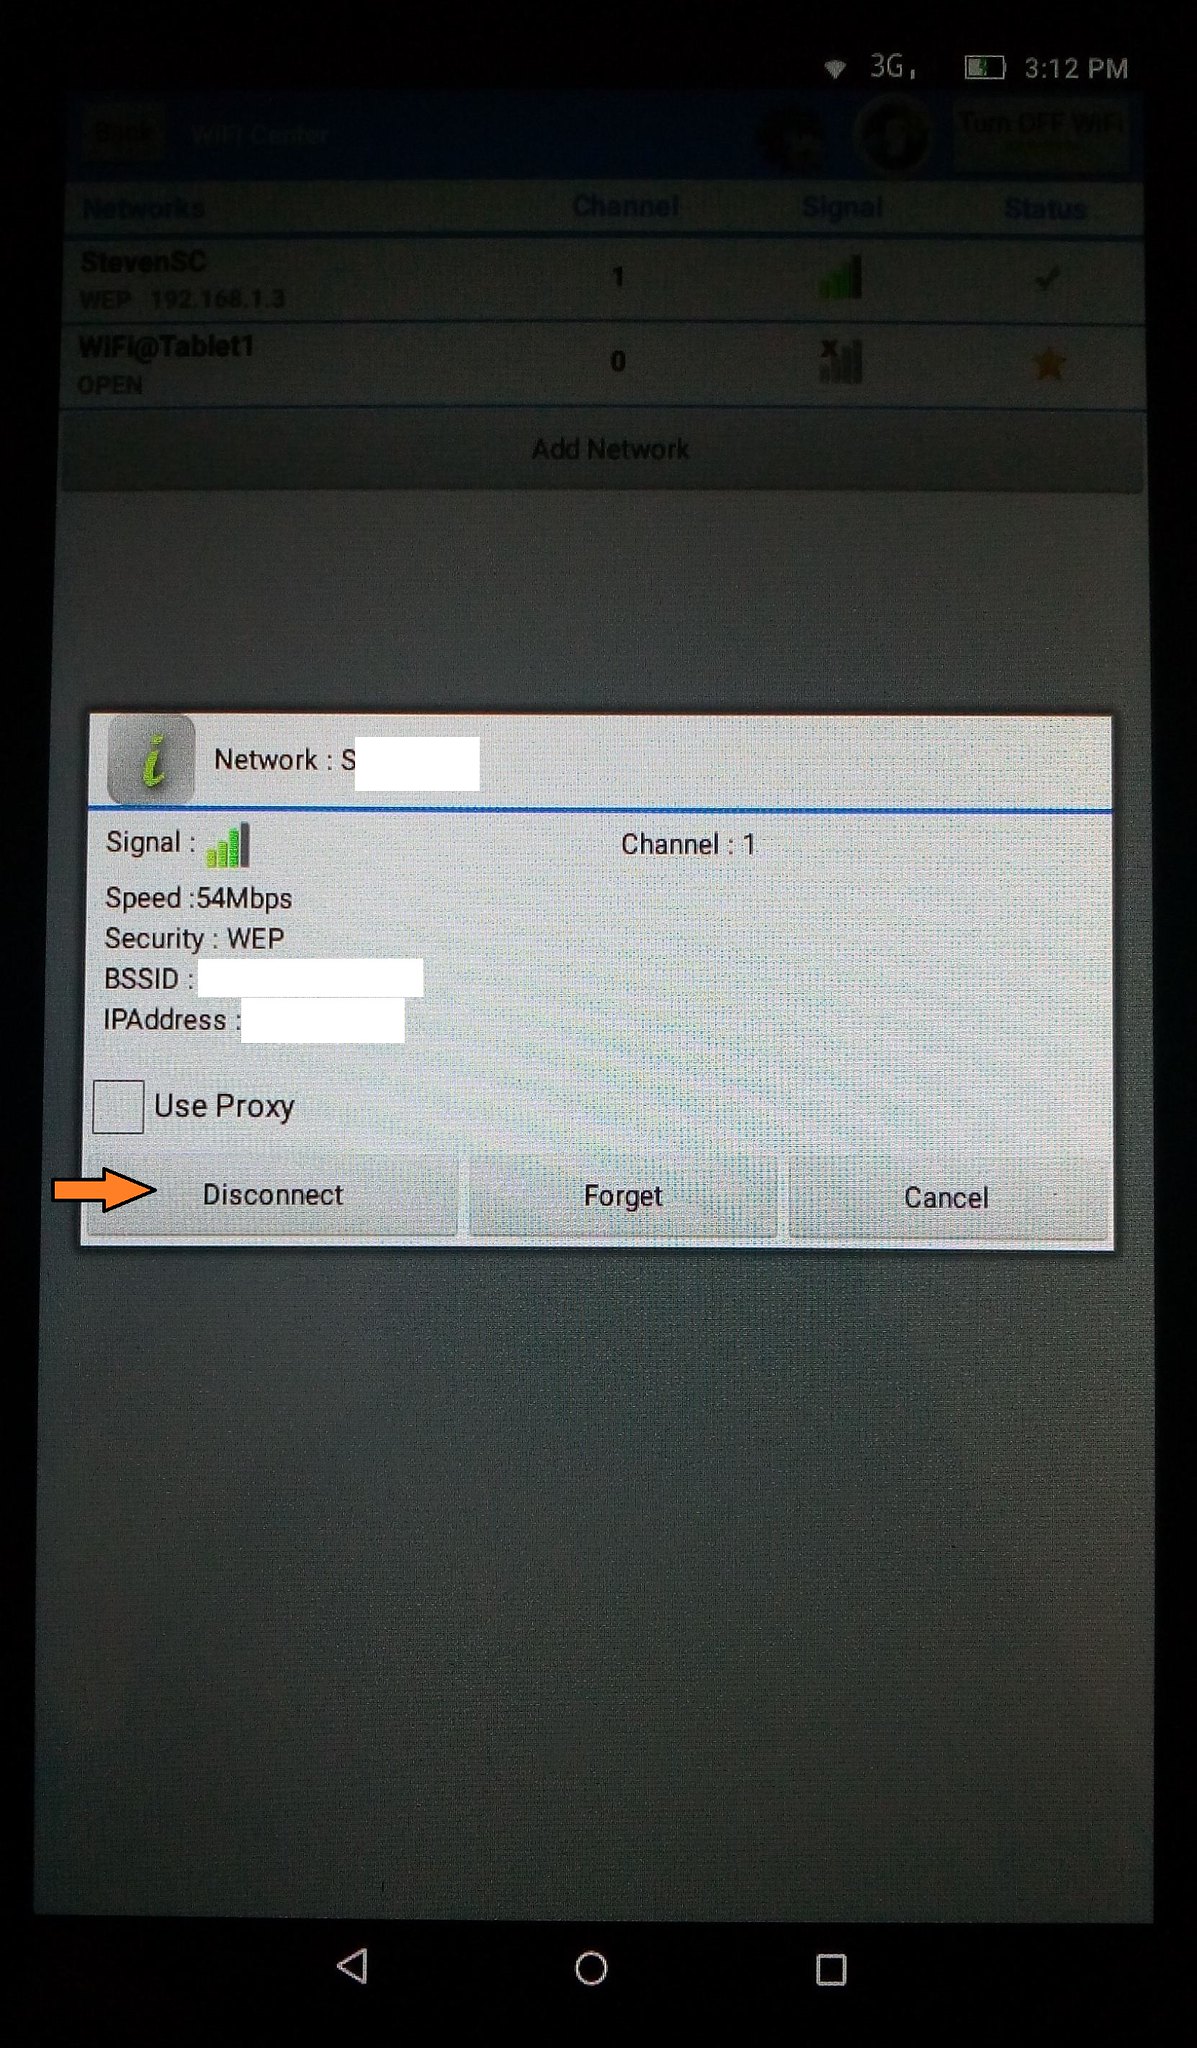 |
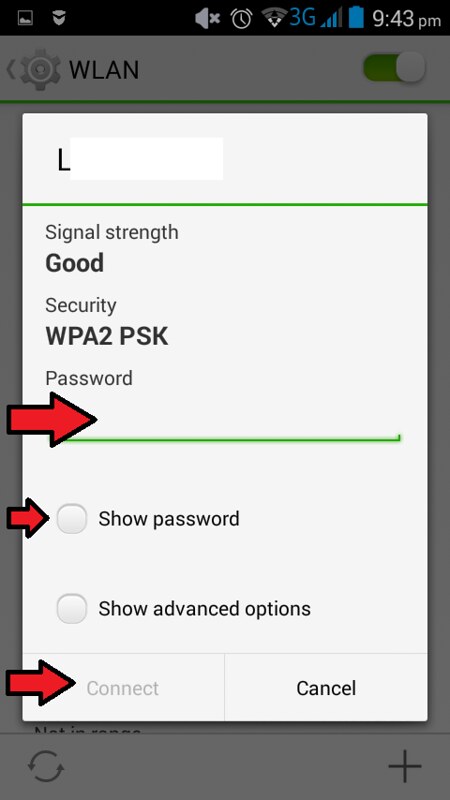
| 7.Connect |
 |
| 7.Connect |
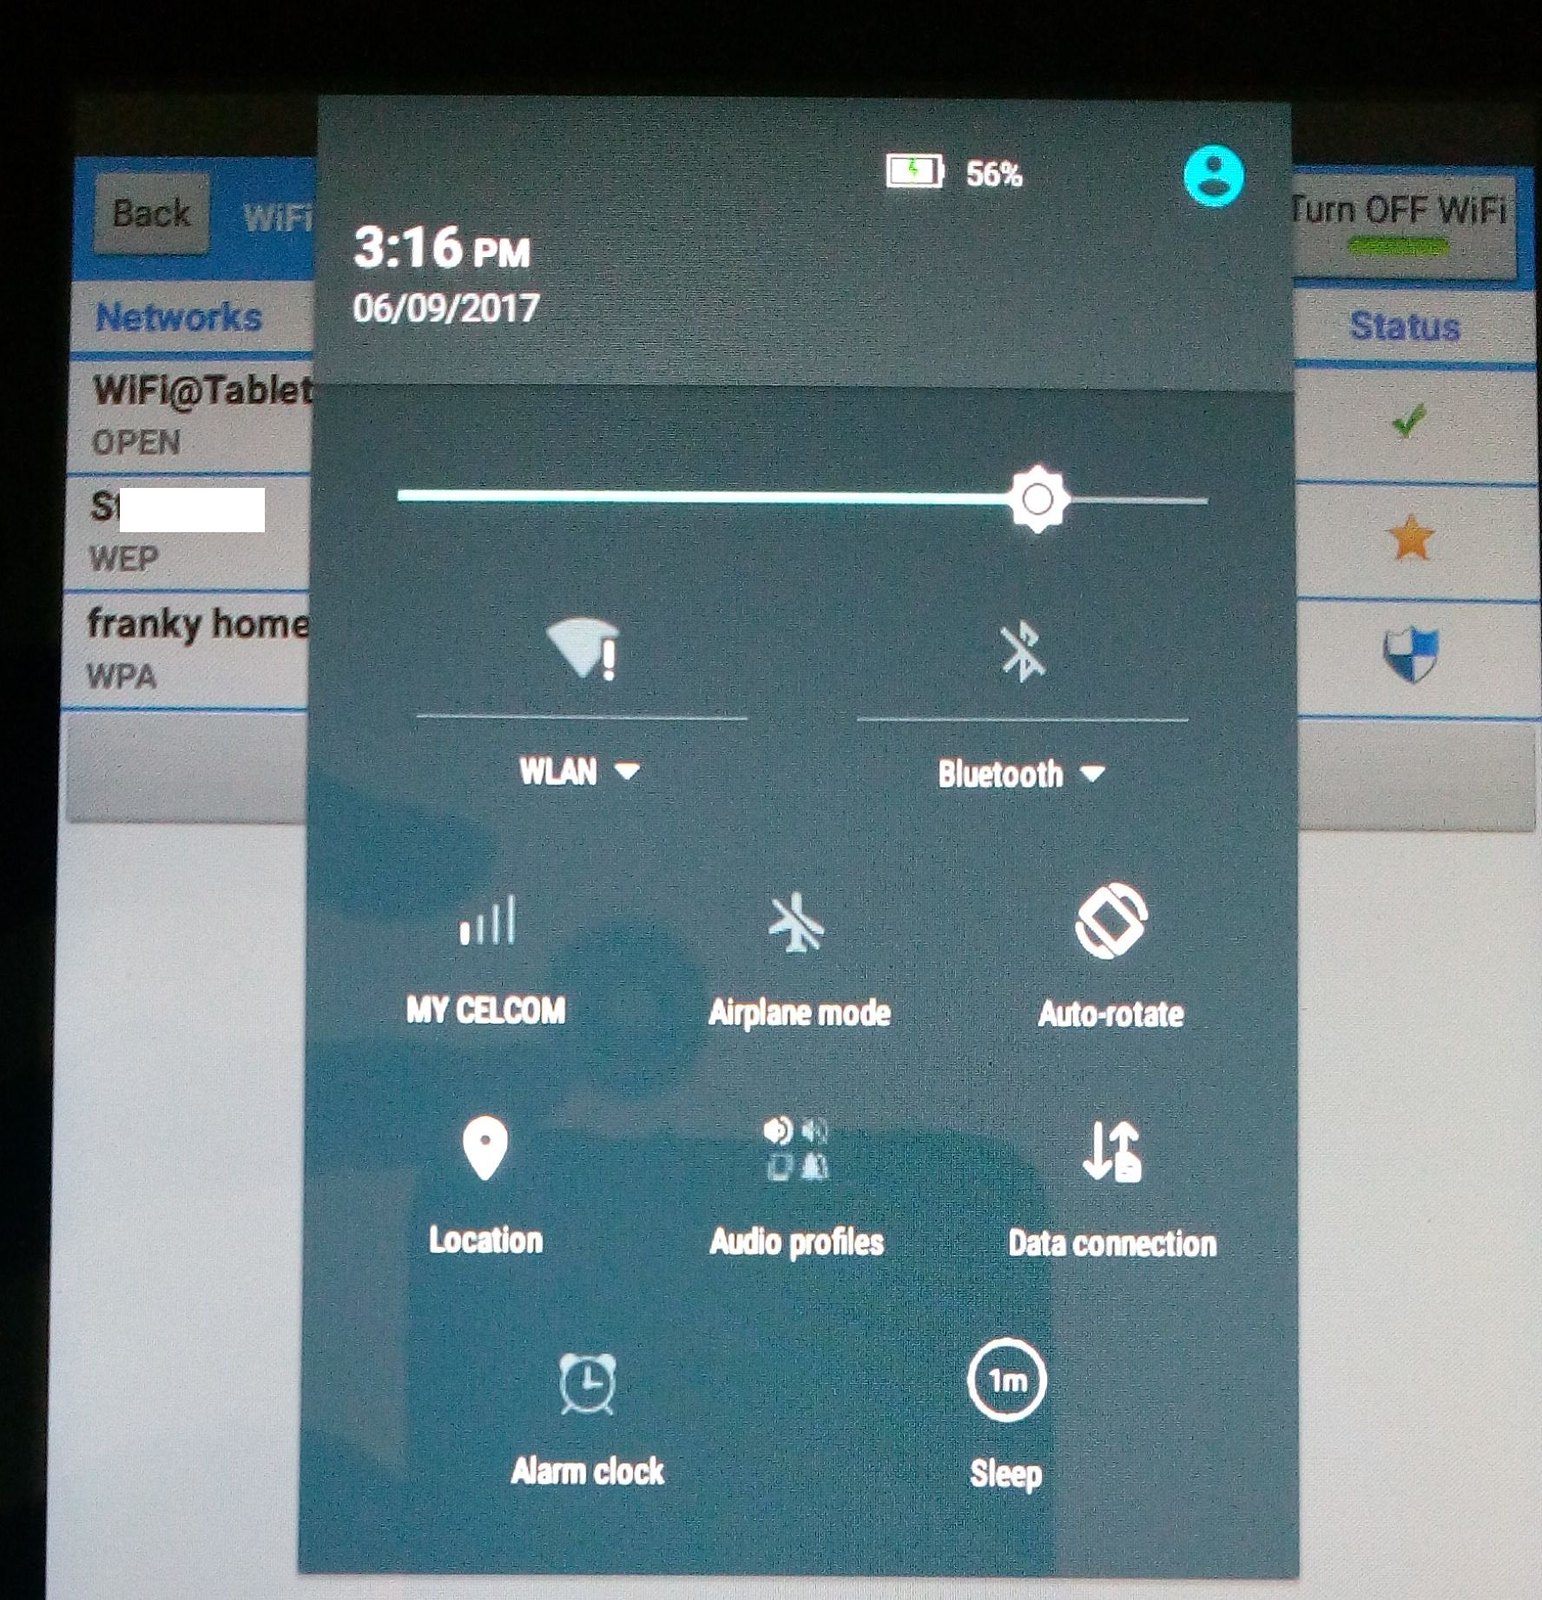 |
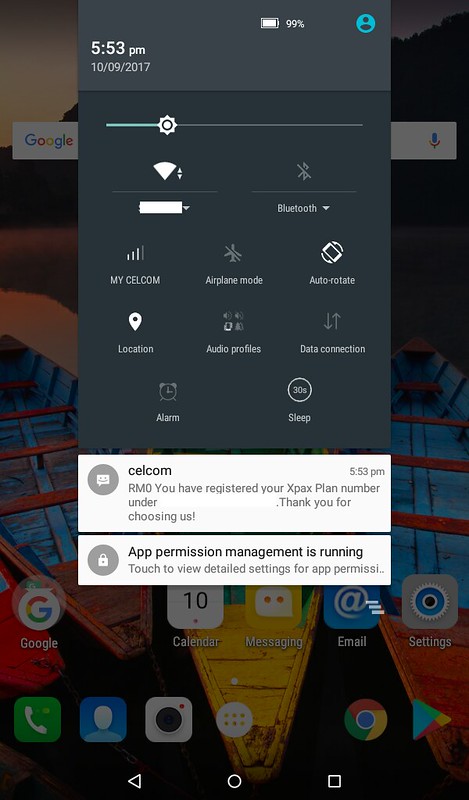
| 8.Or alternately, scroll down the screen |
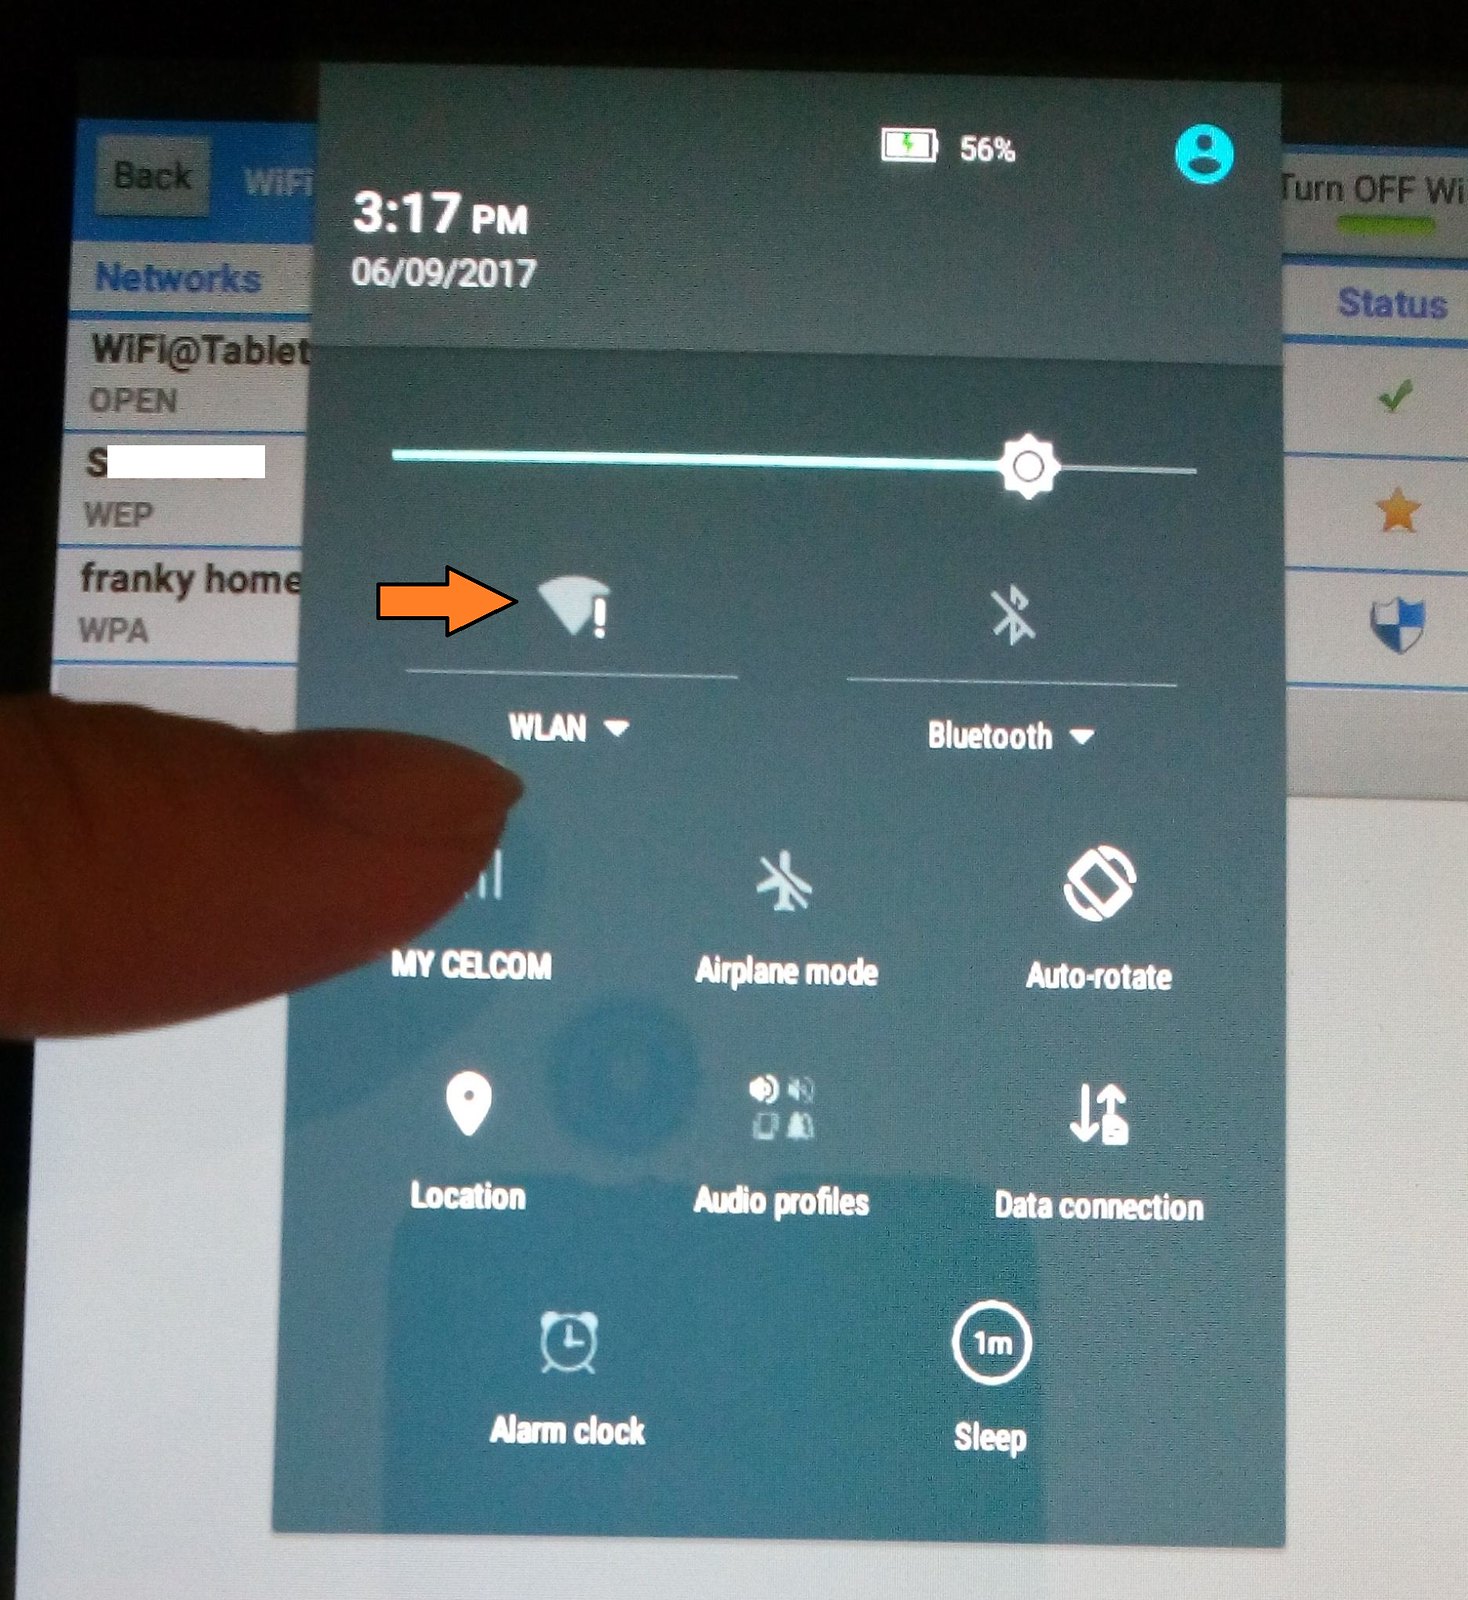 |
| 9.Click WLAN |
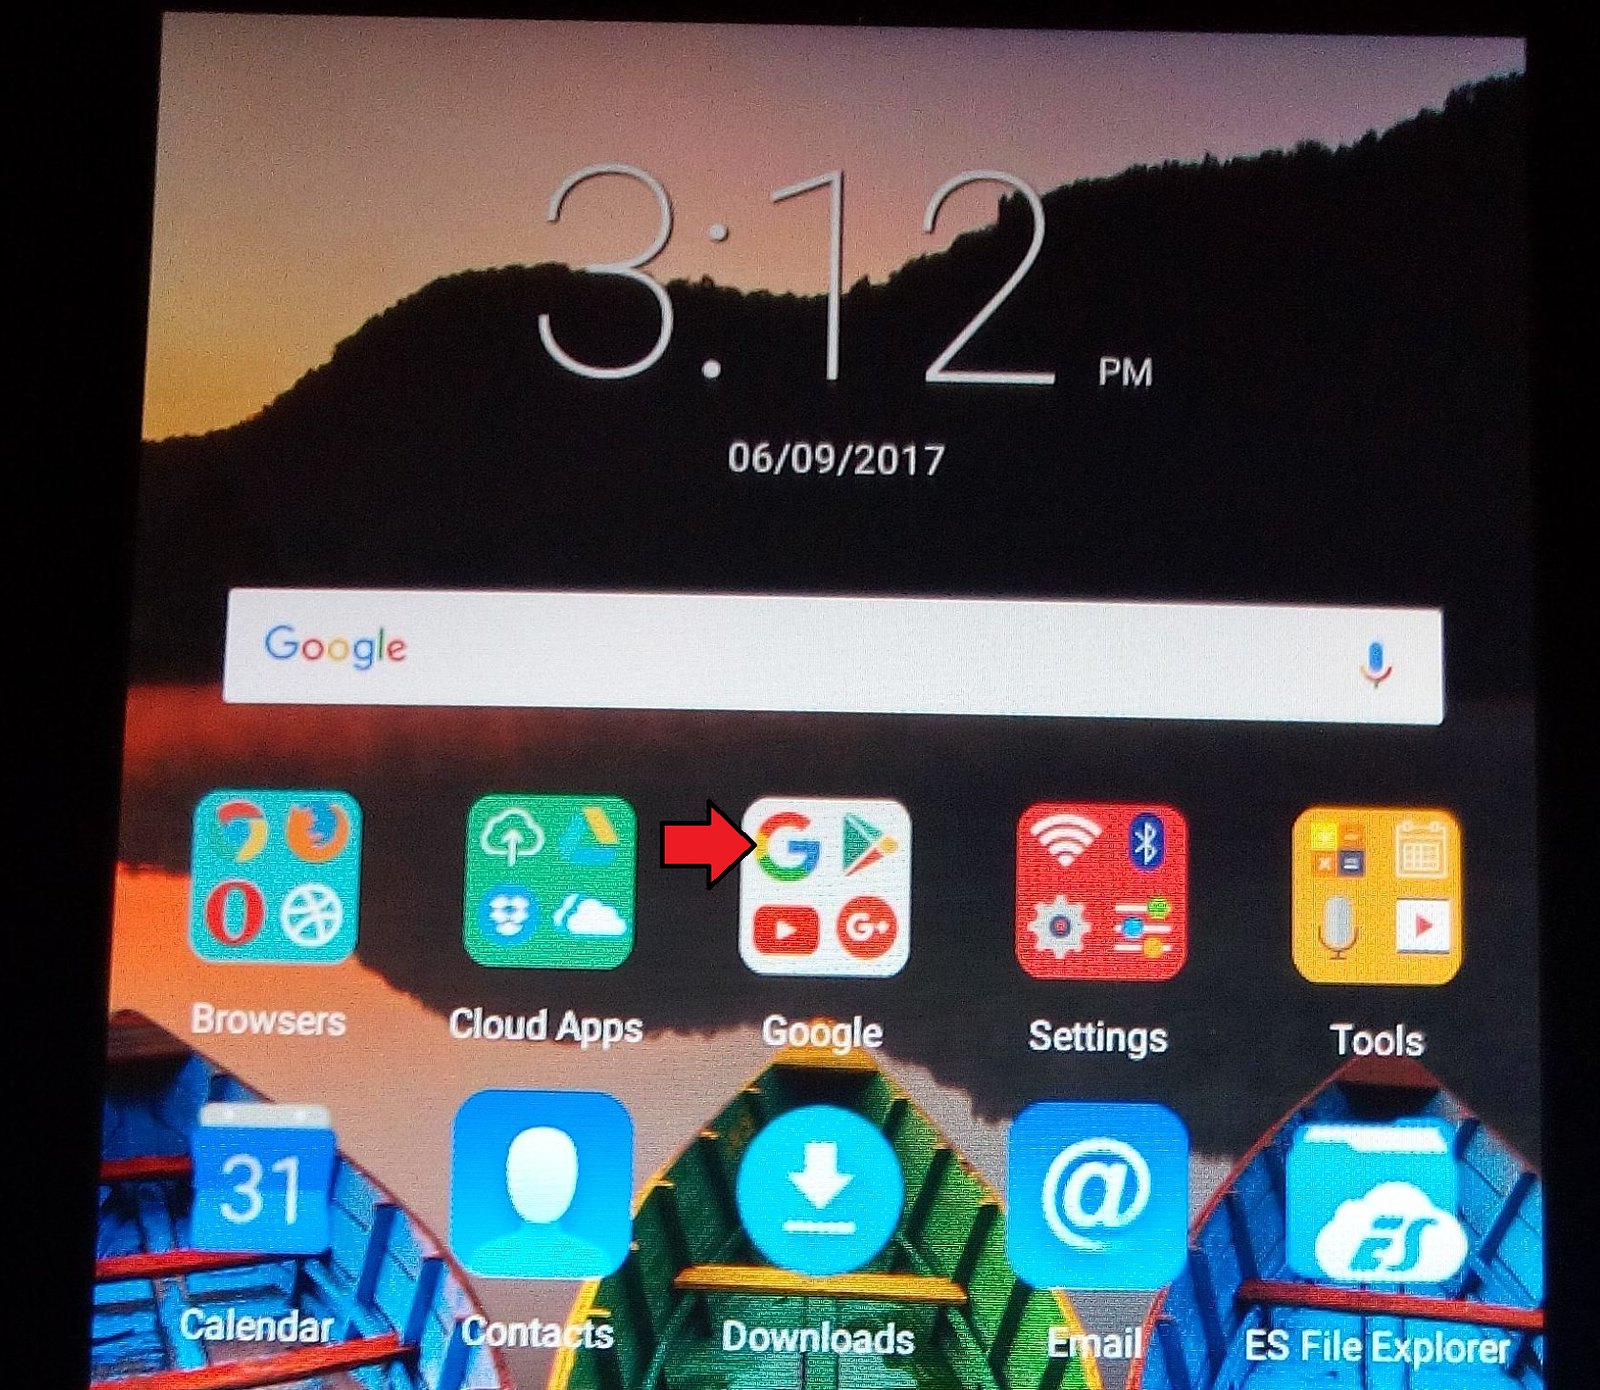 |
| 10.Back to Home Screen, click Google |
 |
| 10.Back to Home Screen, click Google |
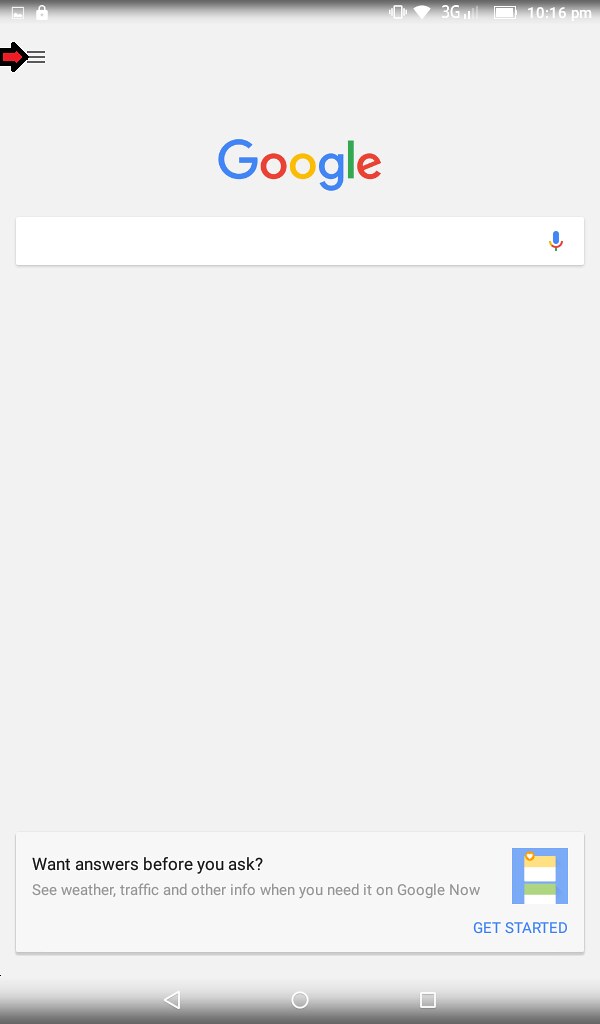 |
| 11.Click top left |
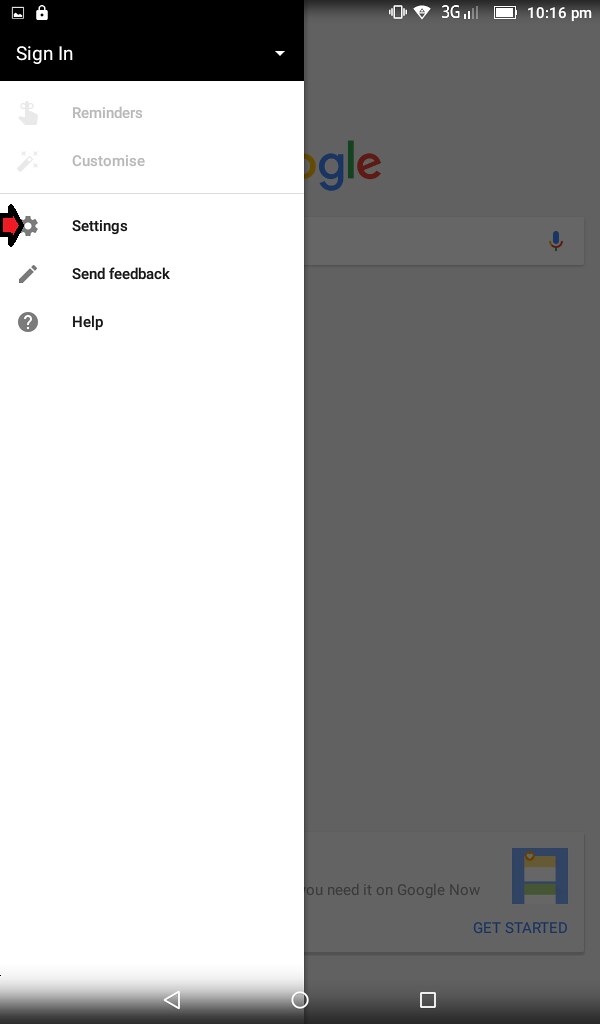 |
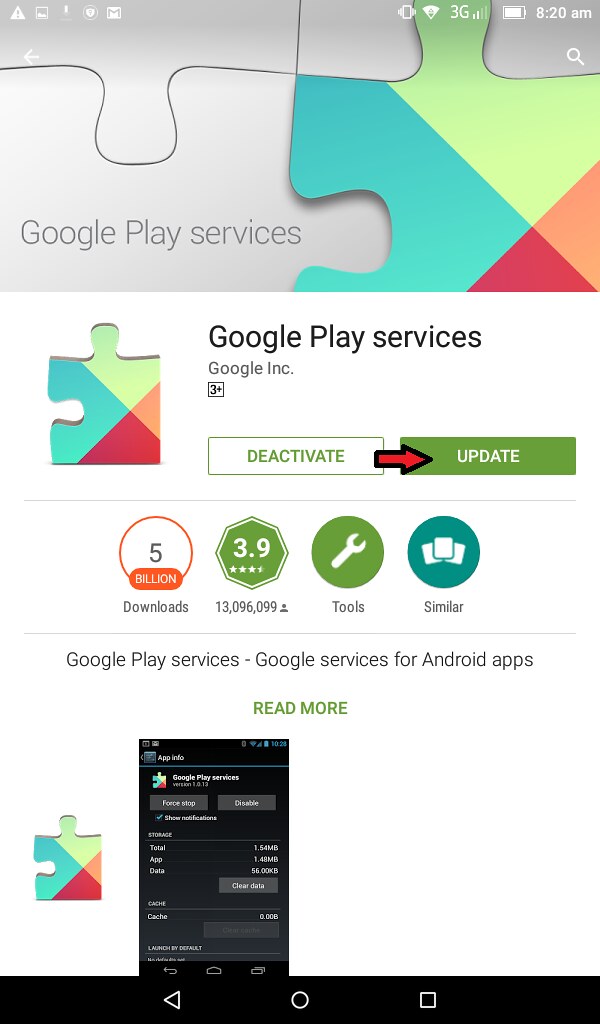
| 12.Go to Settings |
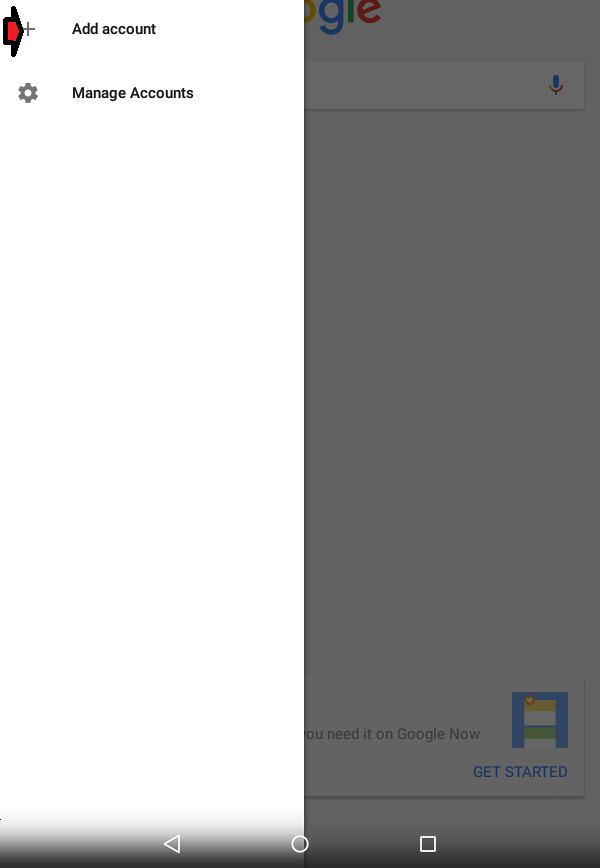 |
| 13.Add account |
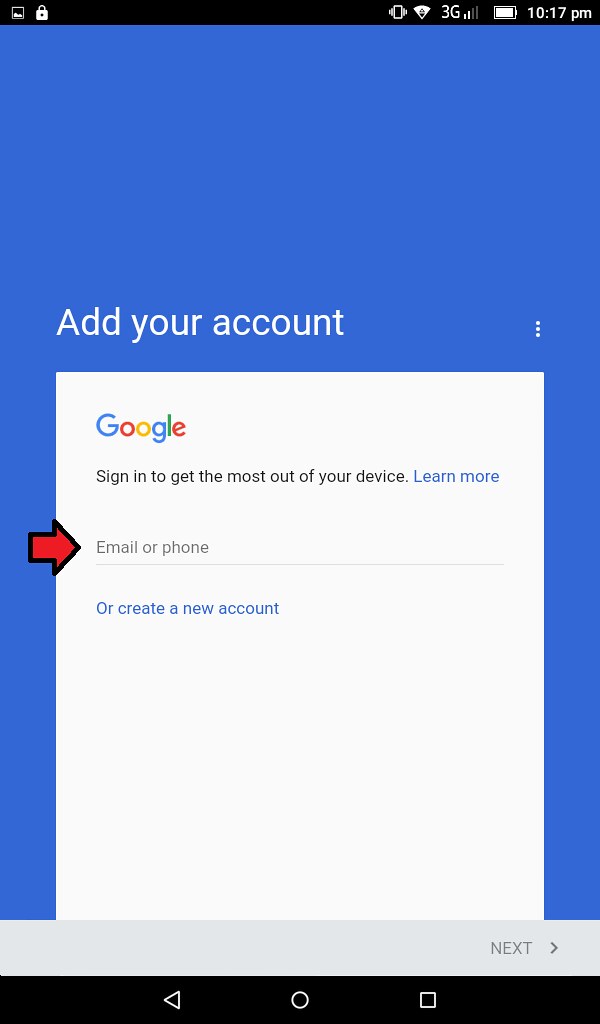 |
| 14.Sign in email using your gmail account, the same with your smartphone |
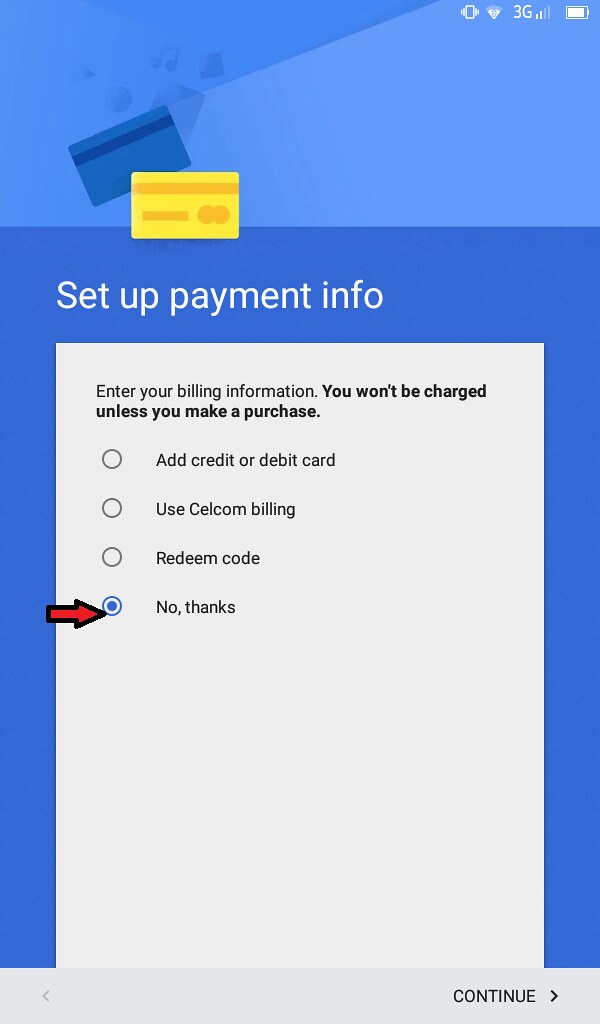 |
| 15.Click No Thanks |
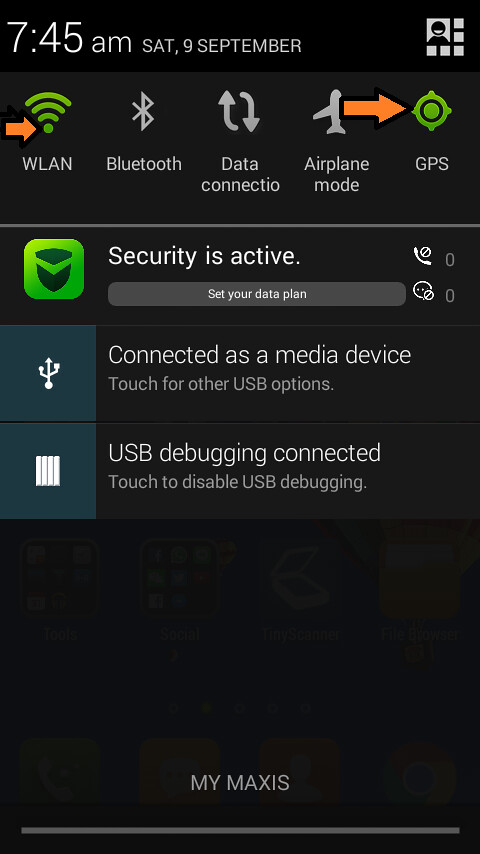 |
| 16.Take out your own Smartphone and make sure wifi and GPS(Location) is connected. |
 |
| 17.Back to Home Screen, click Google Play |
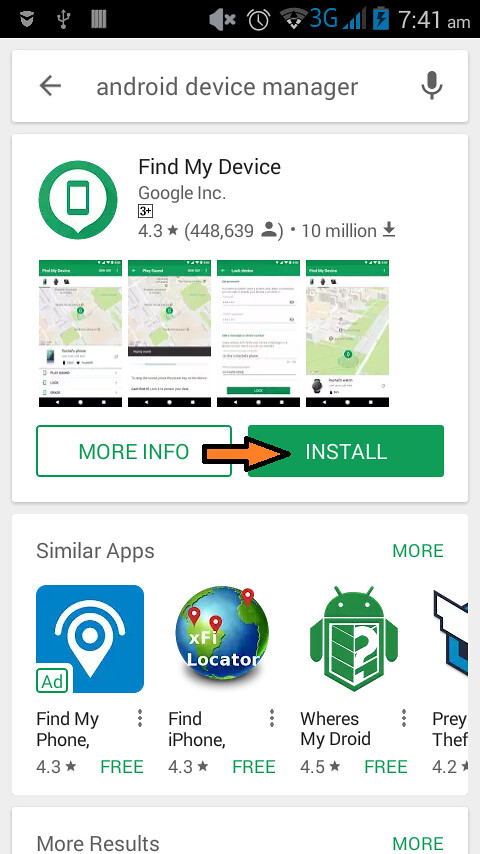 |
| 18.Search Android Device Manager. Install it |
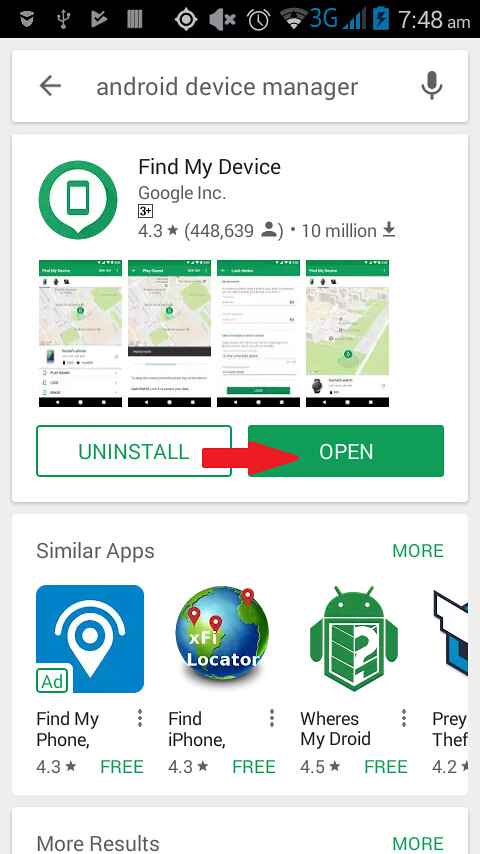 |
| 19.After finish installing, open it |
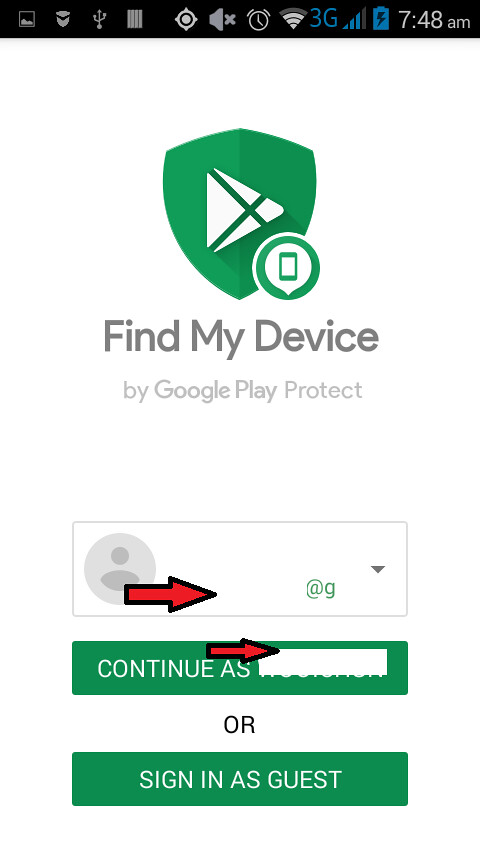 |
| 20.Click to Continue As |
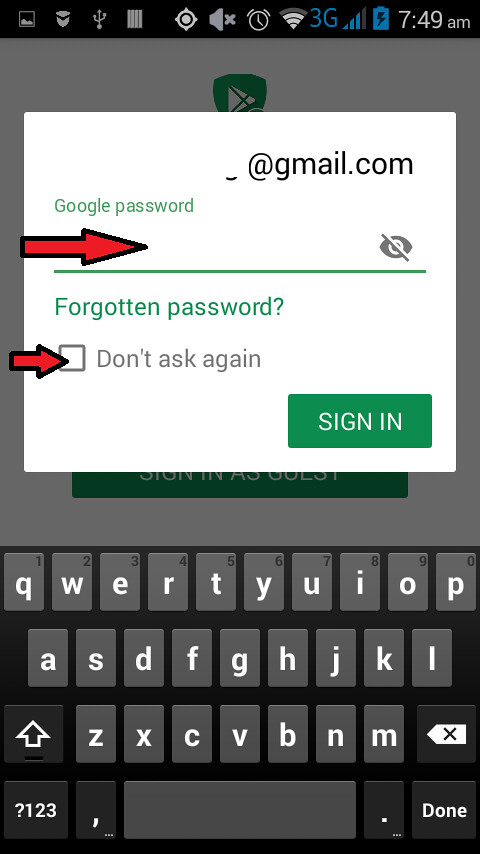 |
| 21.Key in your Gmail password again and click Don't ask again |
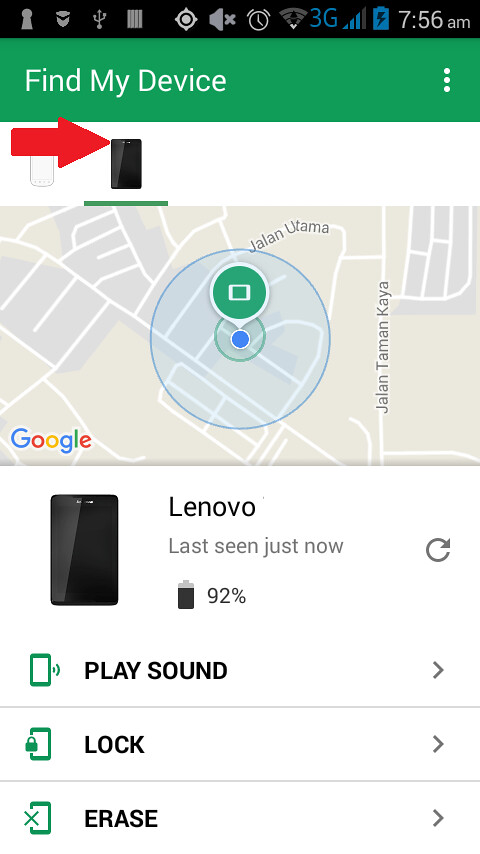 |
| 22.Click the black icon represent your Lenovo Tablet |
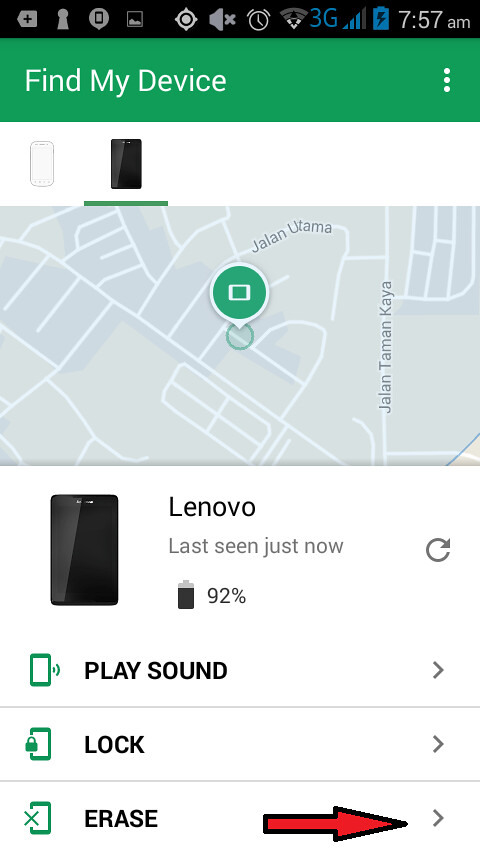 |
| 23.Click ERASE |
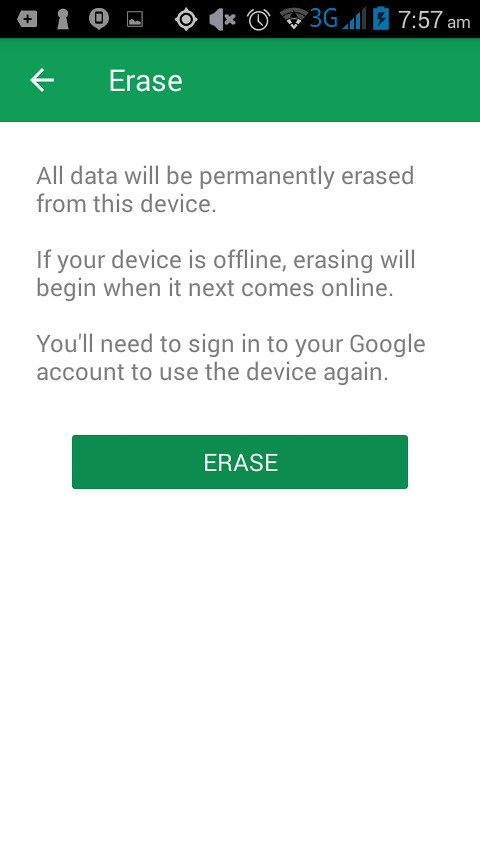 |
| 24.Click ERASE again |
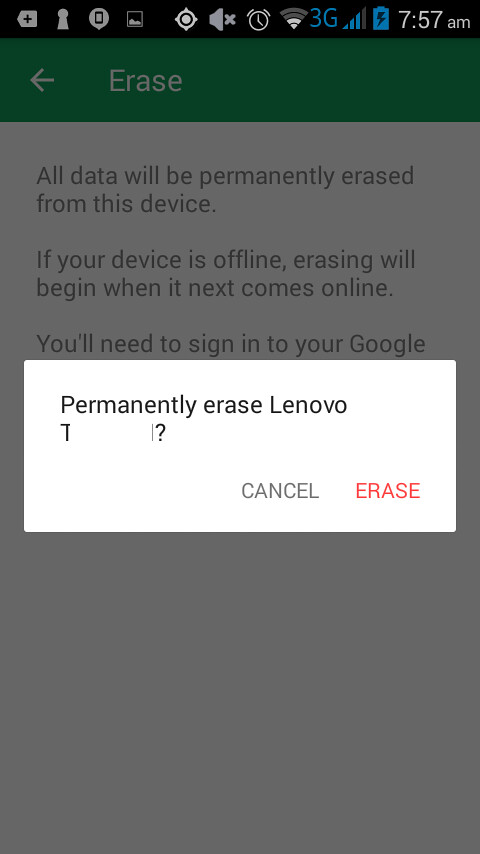 |
| 25.Final ERASE. Then your Lenovo Tablet will restart on its own |
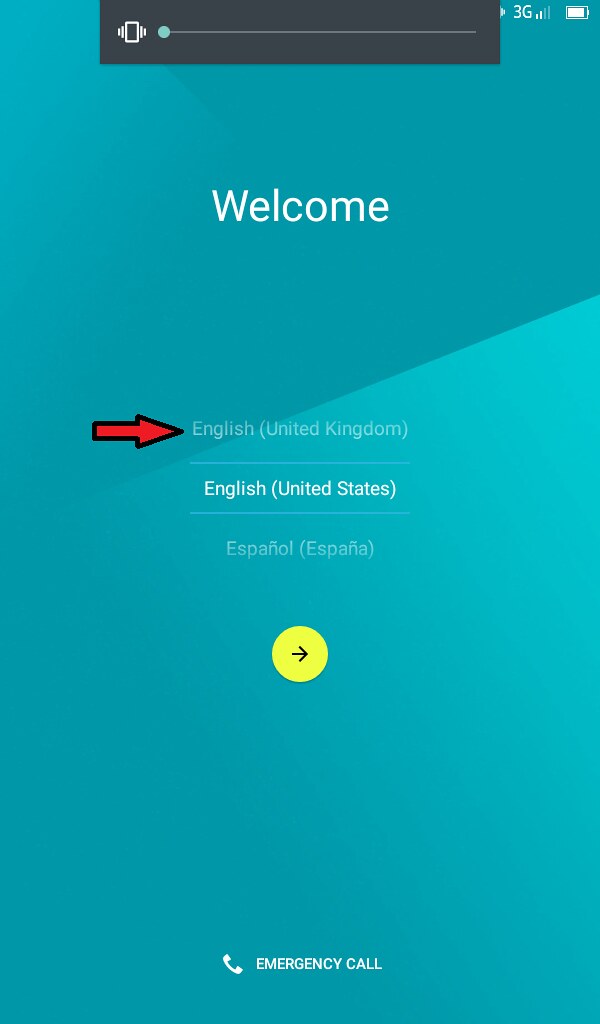 |
| 26.After restarting, you will be ask to register everything again. Click English(United Kingdom) |
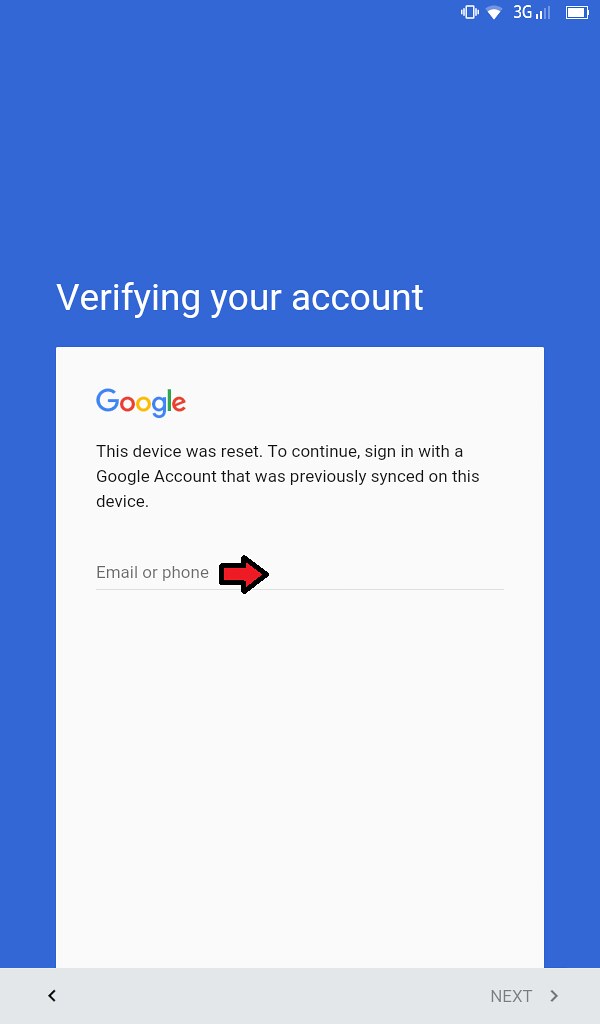 |
| 27.Fill in your Gmail Account again |
 |
| 28.Click No Thanks |
 |
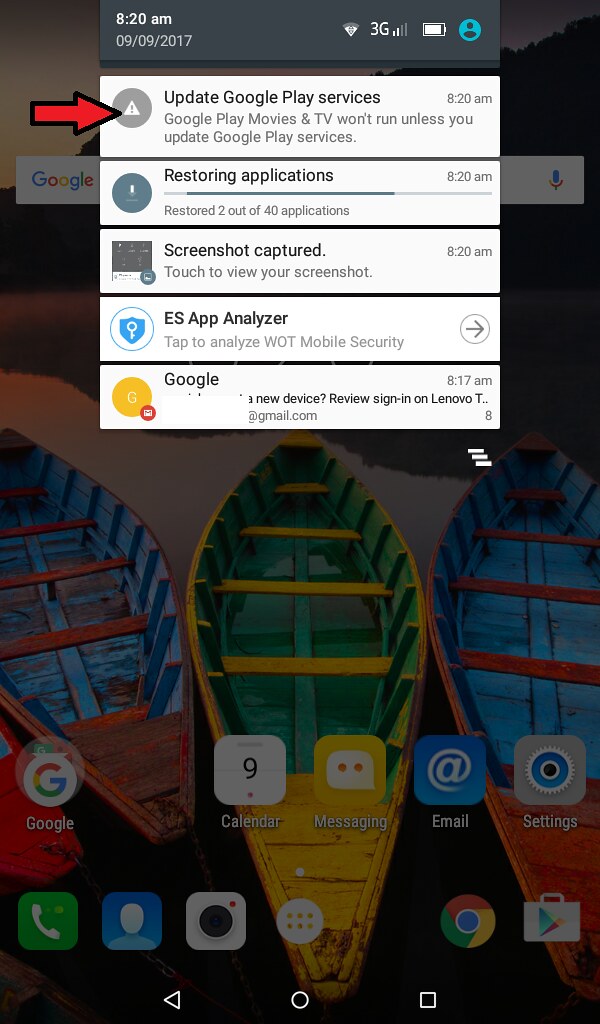
| 29.You can Click to your email and tell them that it is you |
 |
| 30.You can choose Either to Update or Not |
 |
| 30.You can choose Either to Update or Not |
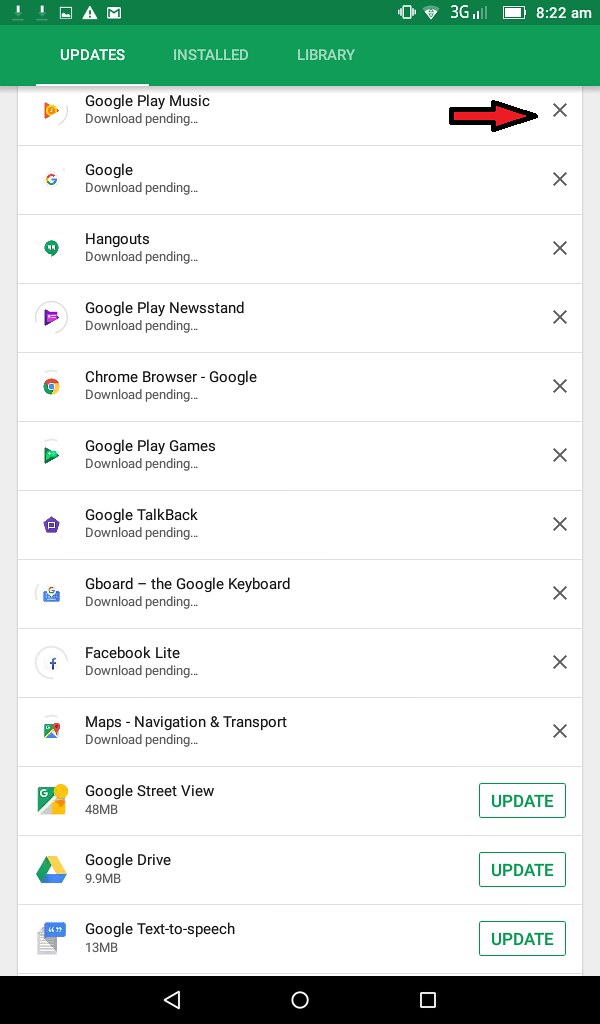 |
| 31.If you didn't want to update, just click X each of it |
 |
| 32.If click Update then have to wait until finish updating |
 |
| 33.In Home Screen, Click Setting Icon |
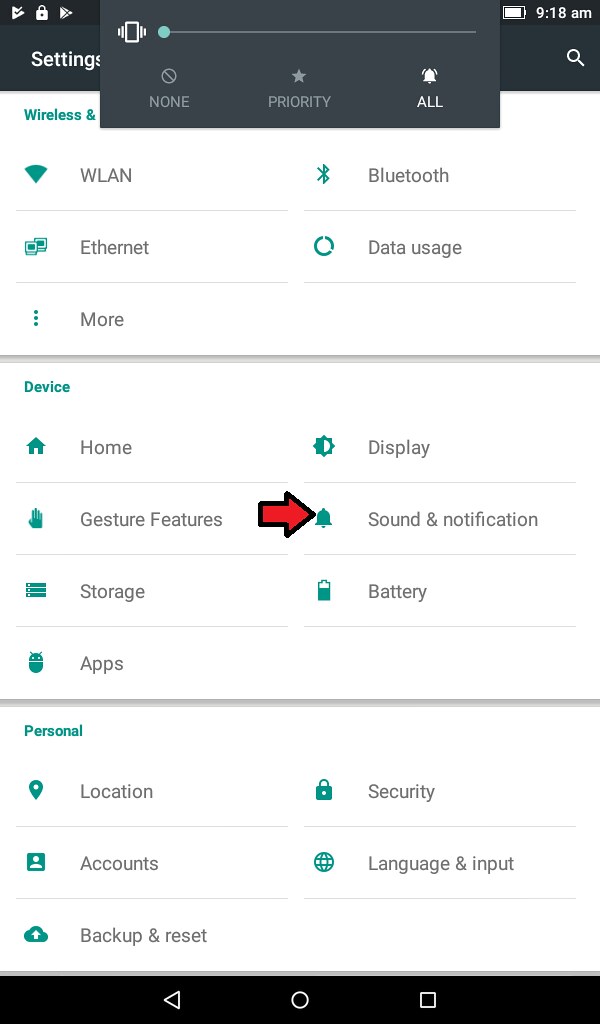 |
| 34.Click Sound & Notification |
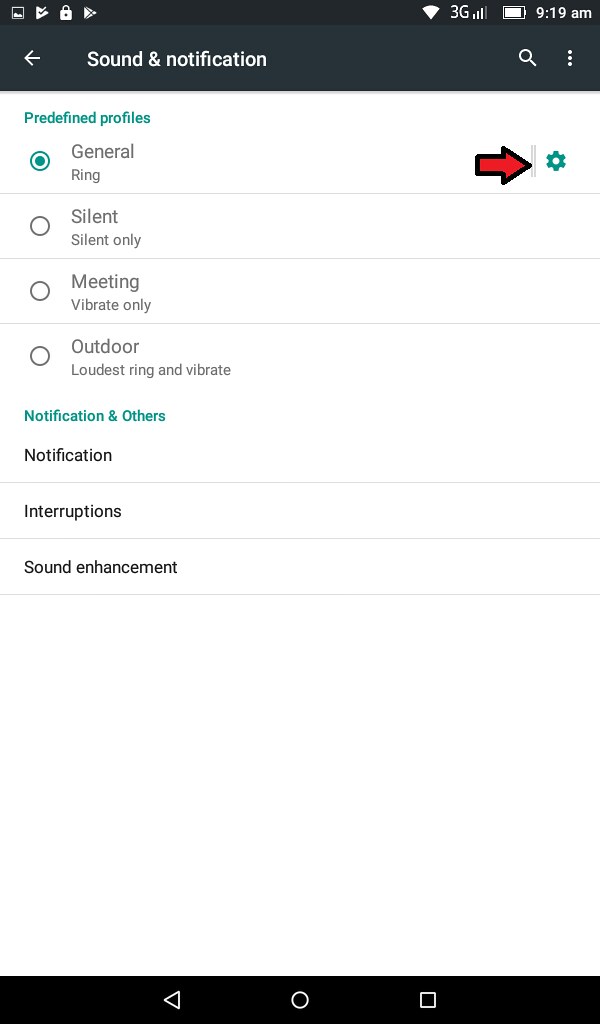 |
| 35.Click General |
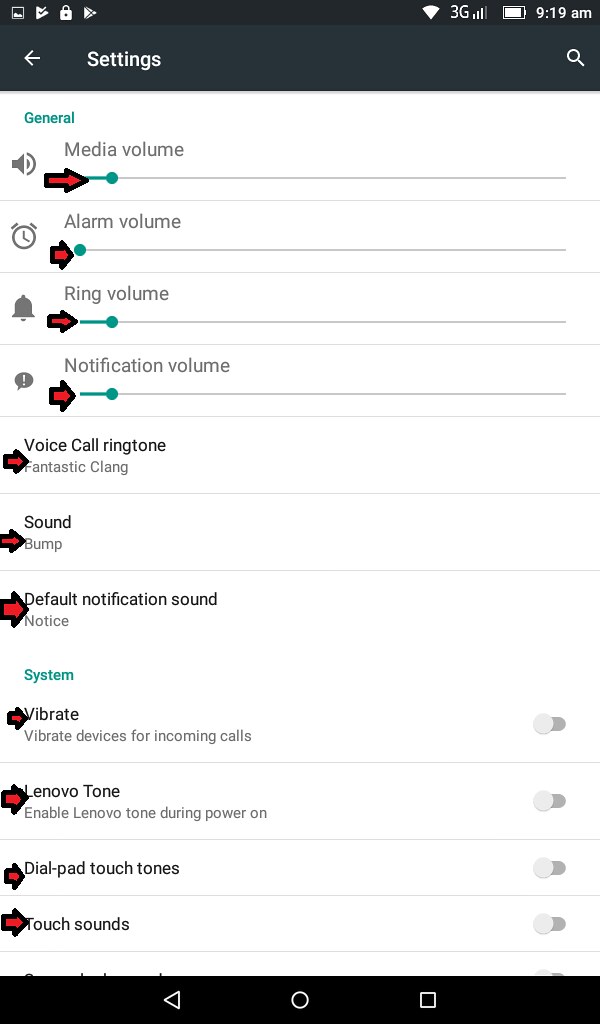 |
| 36.Click everything to lower the sounds and disable Vibrate |
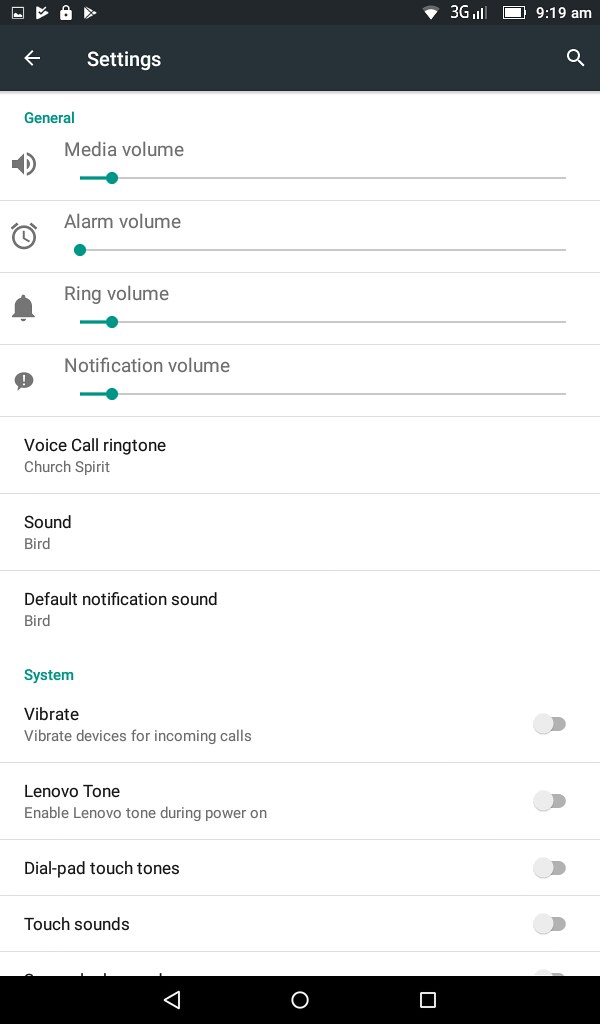 |
| 36.Click everything to lower the sounds and disable Vibrate |
 |
| 37.Go to Google Play again |
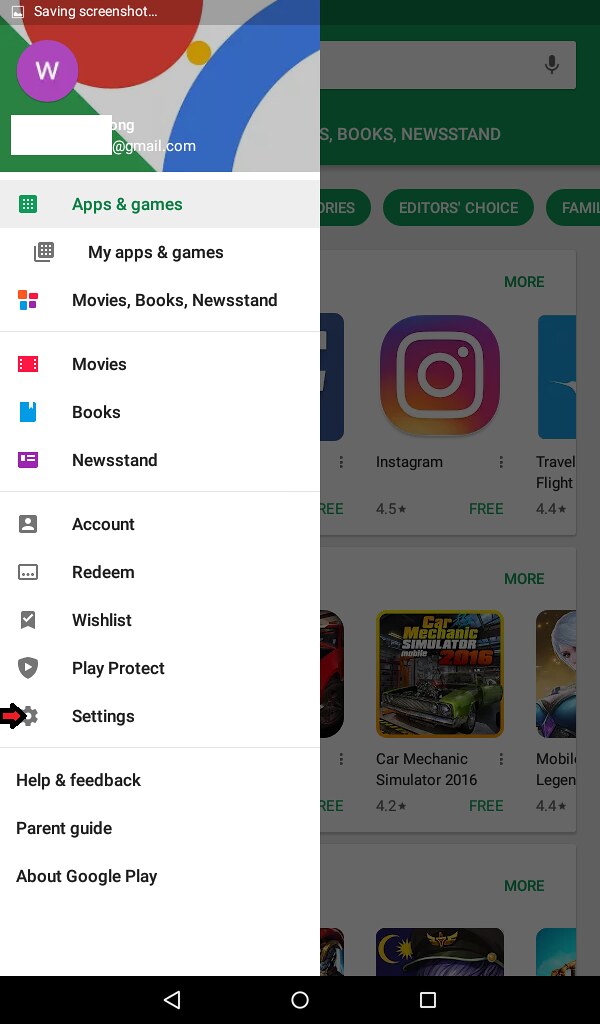 |
| 38.Click Settings |
 |
| 39.Click Auto-update apps |
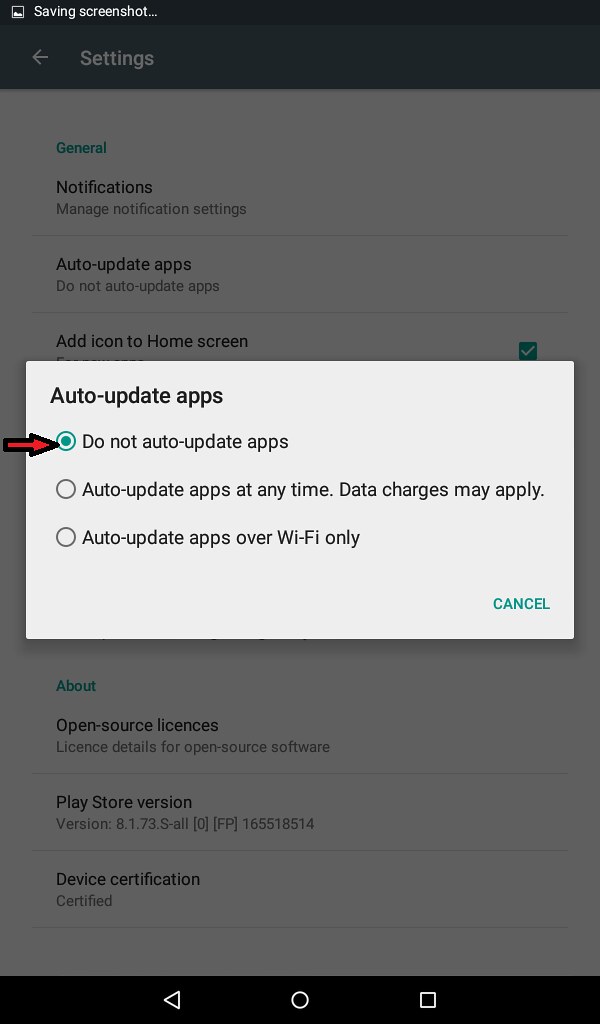 |
| 40.Click Do not auto-update apps |
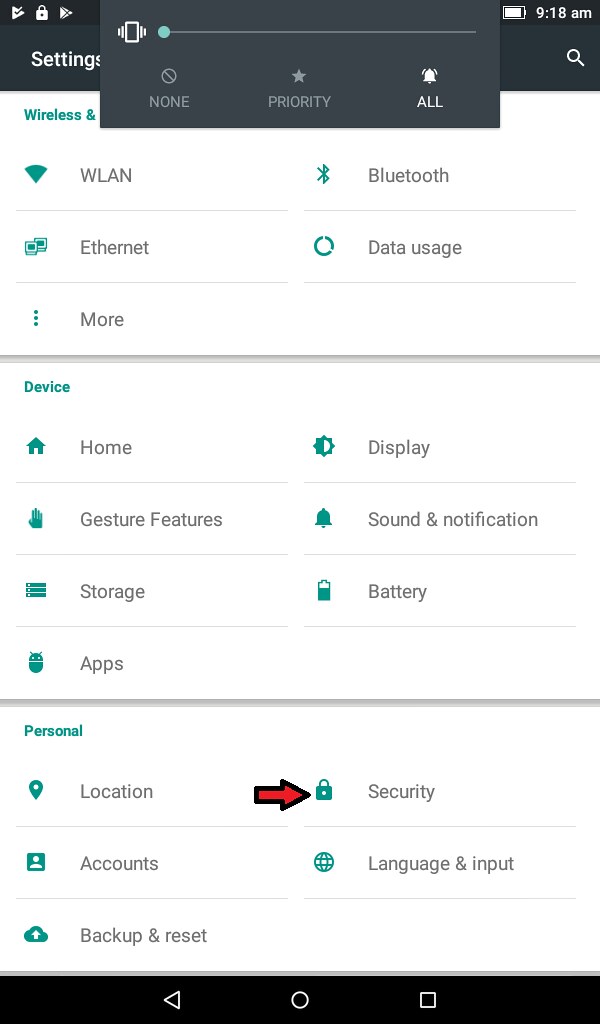 |
| 41.In Home Screen again, Click Settings then Security |
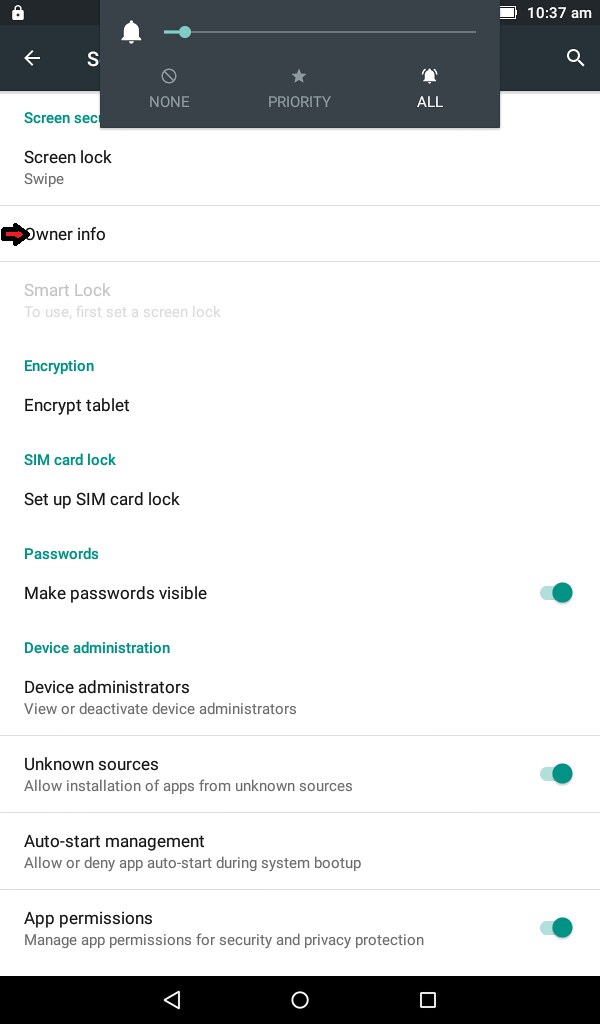 |
| 42.Click Owner Info |
 |
| 42.Click Owner Info |
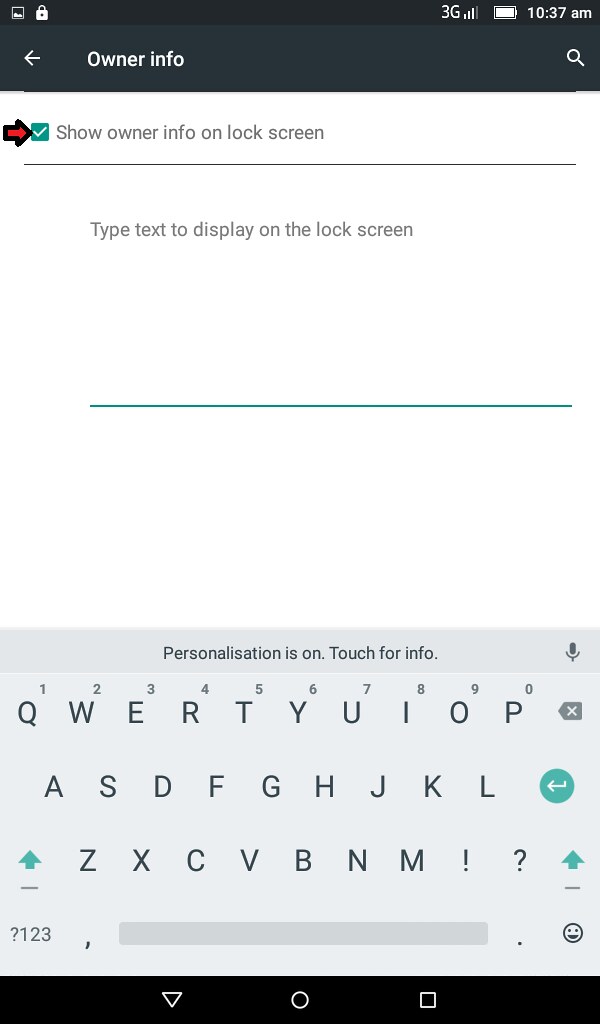 |
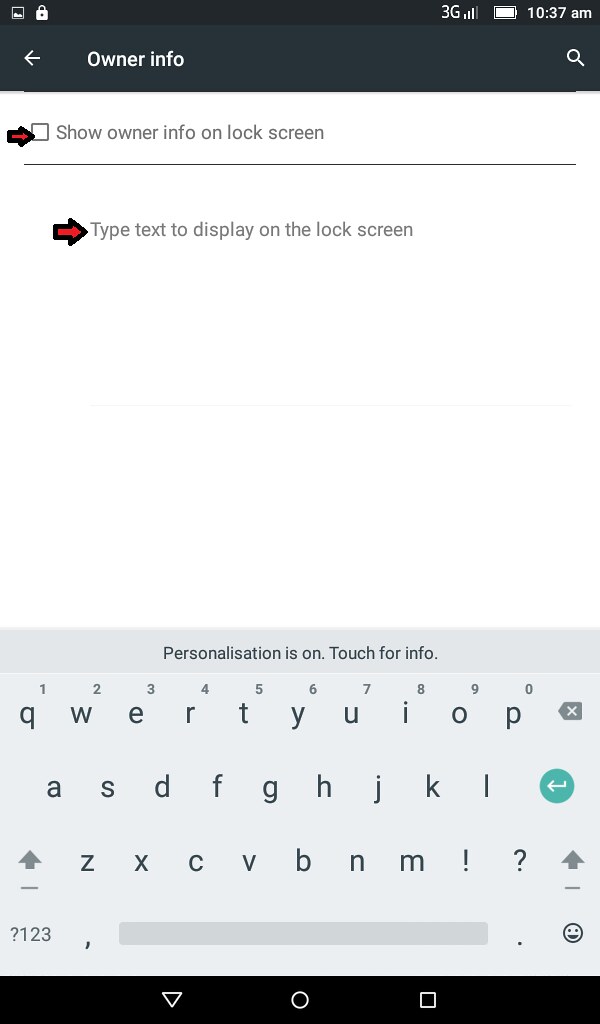
| 43.Click Show Owner on lock screen |
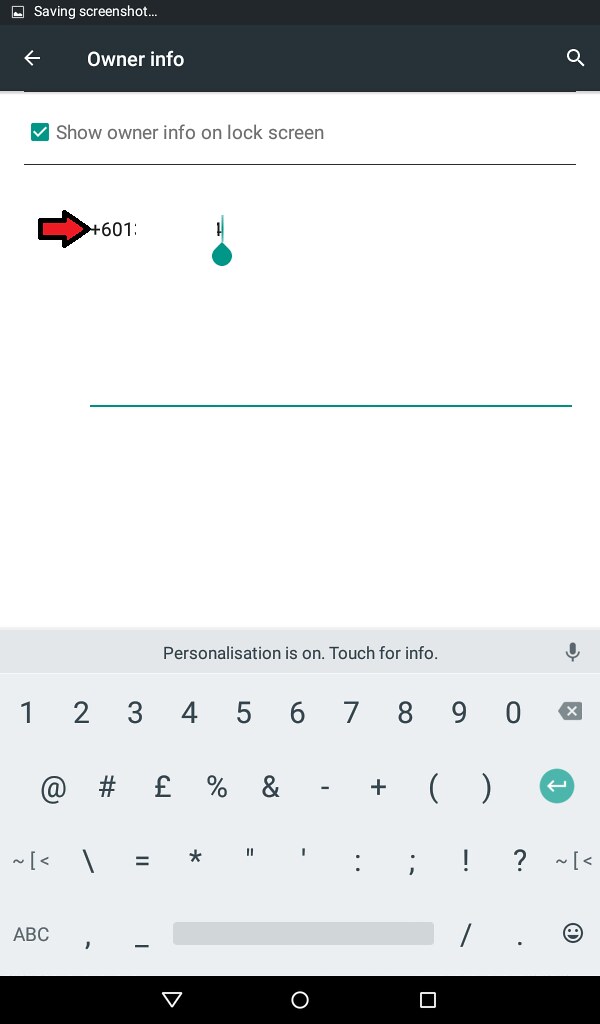 |
| 44.Type your name and phone number, you can type your own smartphone in addition |
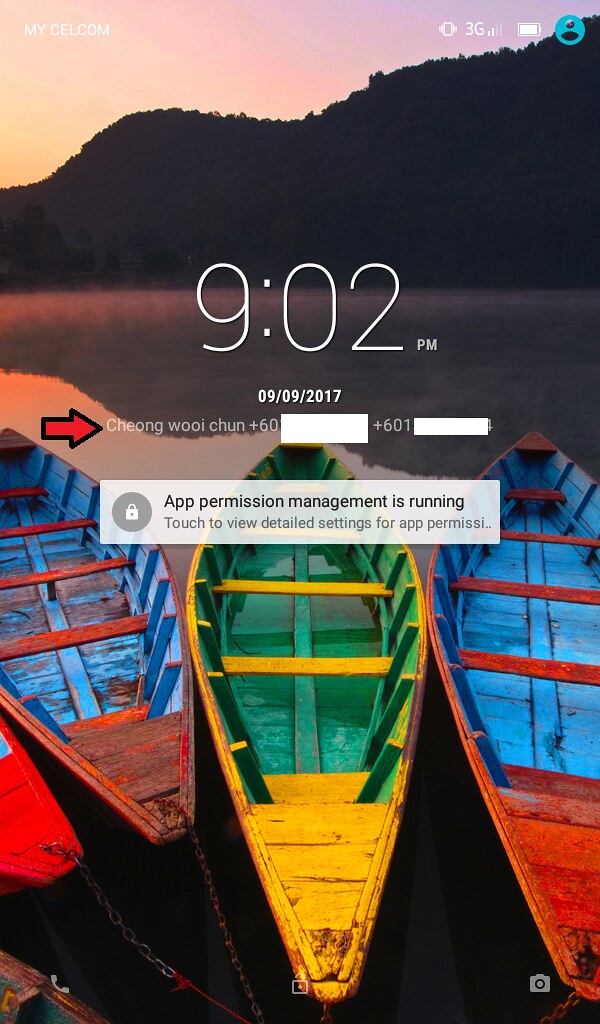 |
| 45.This will appear so that you will know that is your tablet when mixed up |
 |
| 46.Click the middle button on your Home Screen |
 |
| 47.Scroll Right |
 |
| 48.Click Tutor Guru or UM Icon |
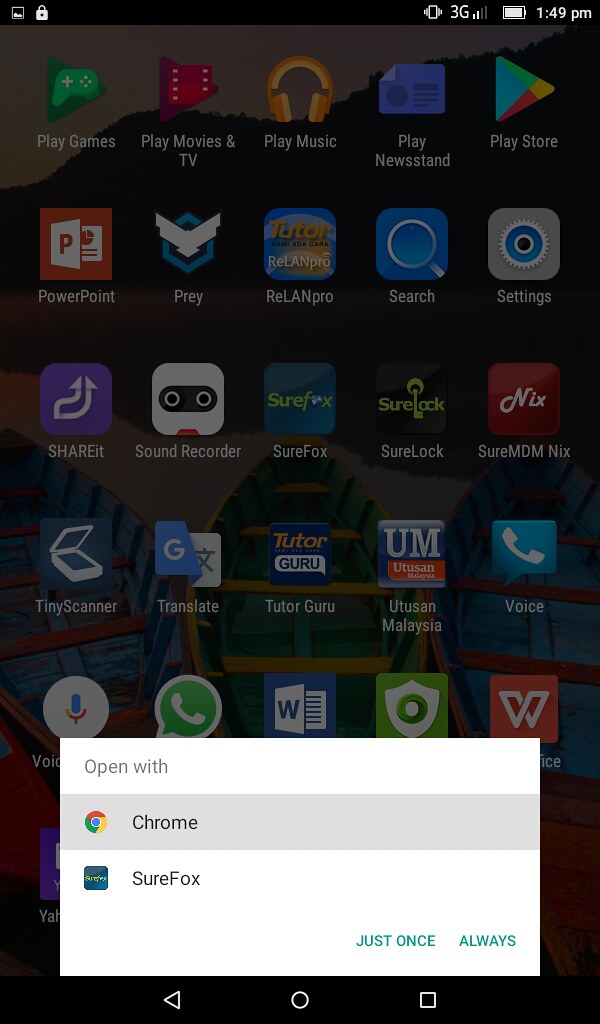 |
| 49.Click Chrome and Always |
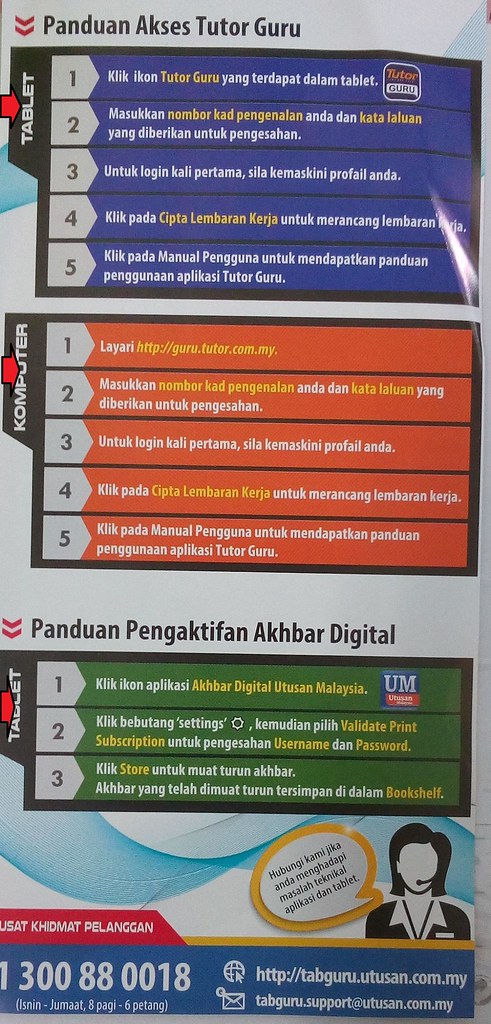 |
| 50.Follow the instructions from the Flyer. There are 3 red arrows, only two for the Tablet |
 |
| 51.For Login and Password |
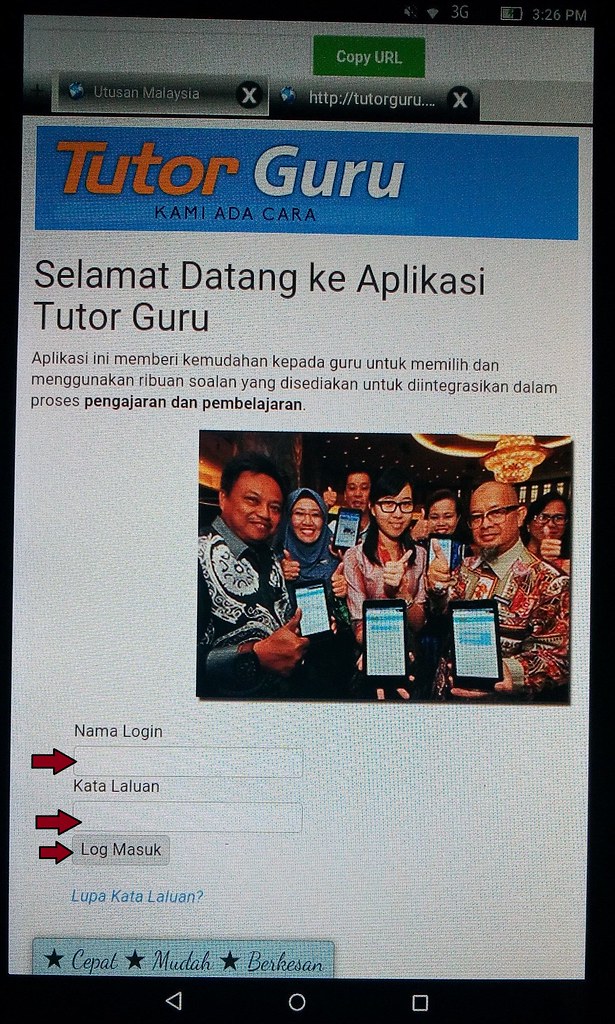 |
| 52.Just Follow all the instructions from the Flyer |
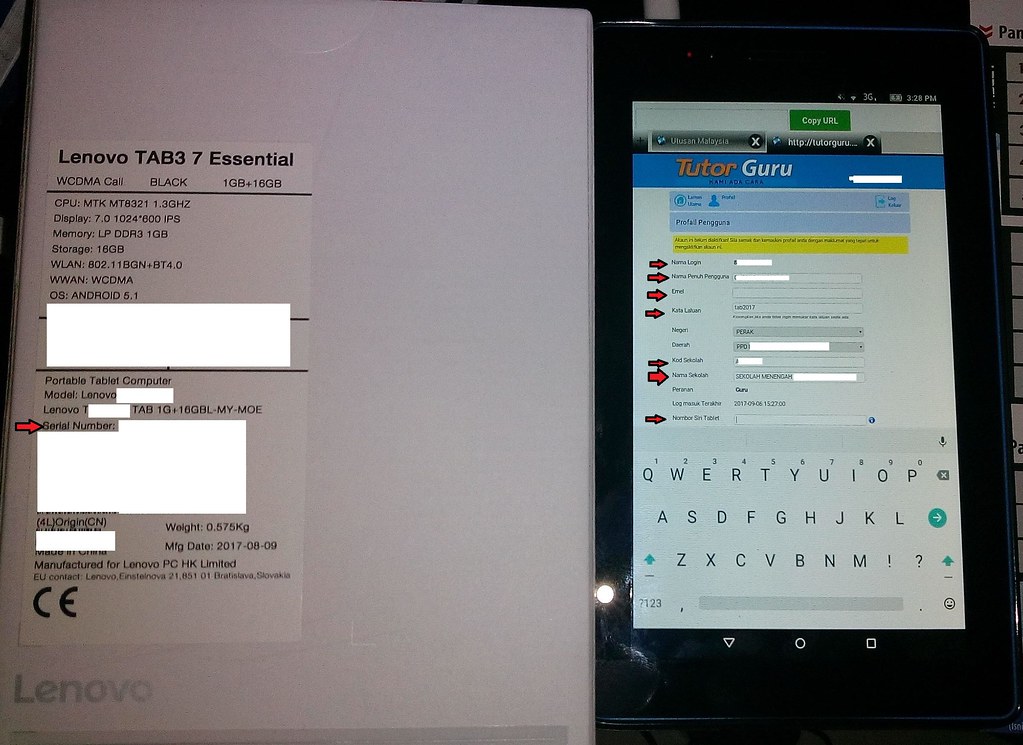 |
| 53.Key in everything and also the Serial Number |
 |
| 54.Click Simpan Maklumat Pengguna |
 |
| 55.Click Cipta Lembaran Kerja |
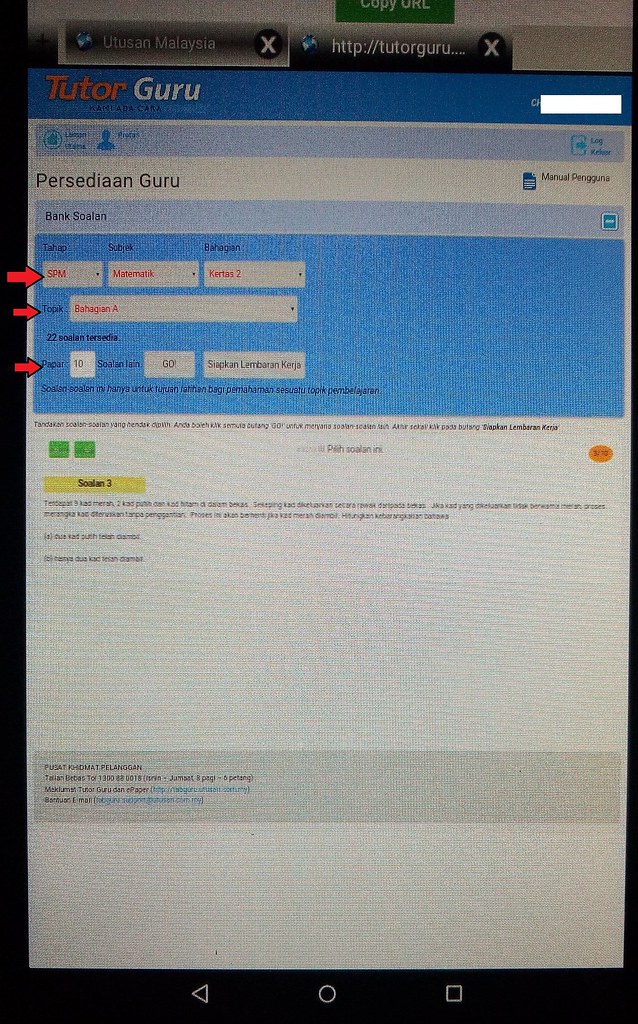 |
| 56.Fill up the required informations |
 |
| 57.All the questions in BM |
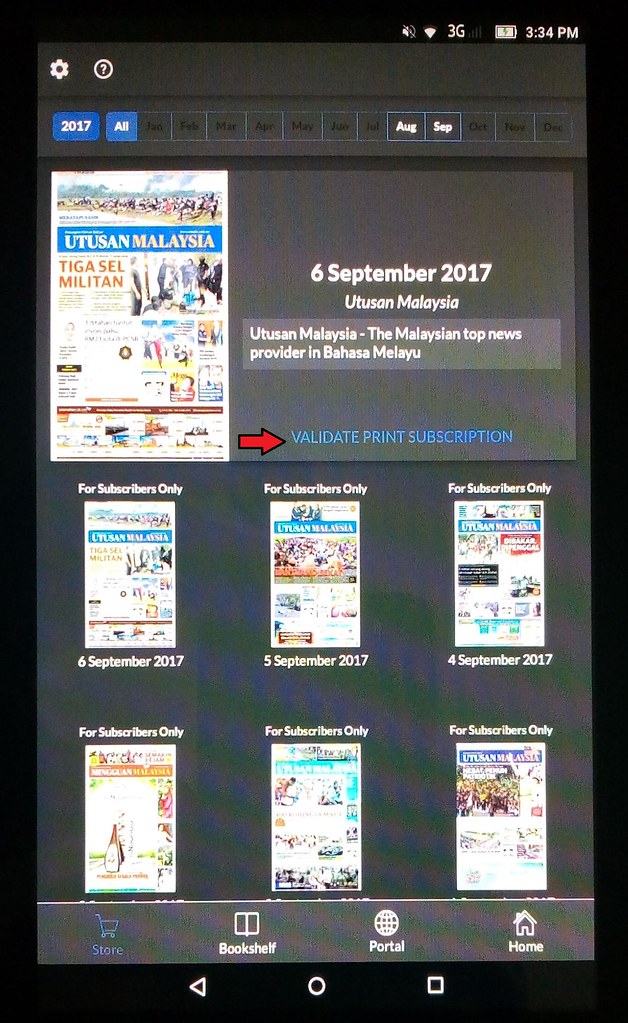 |
| 58.For UM icon, Click Validate Print Subscription |
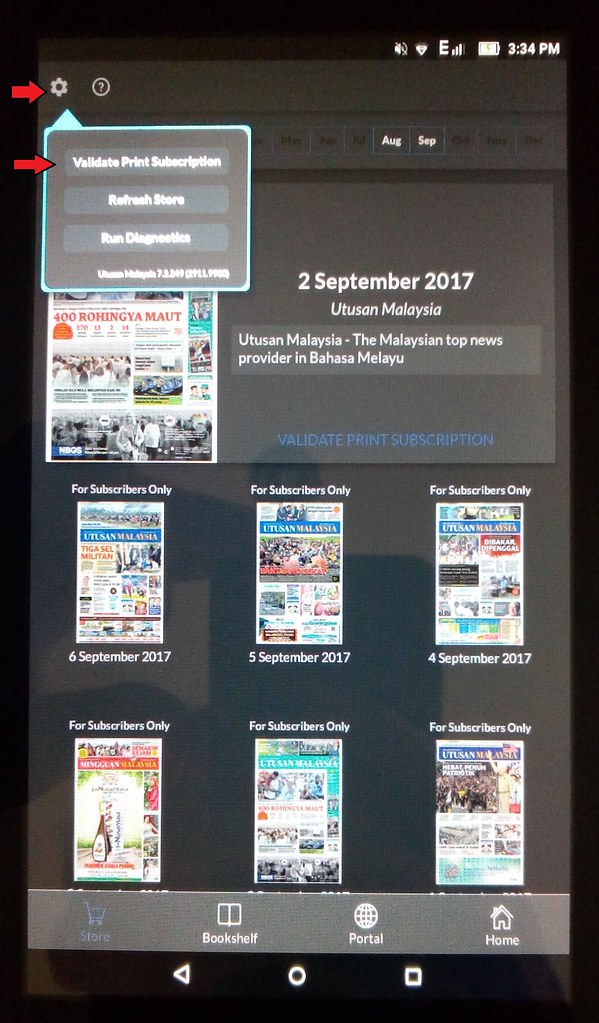 |
| 59.Alternative way to Validate Print Subscription |
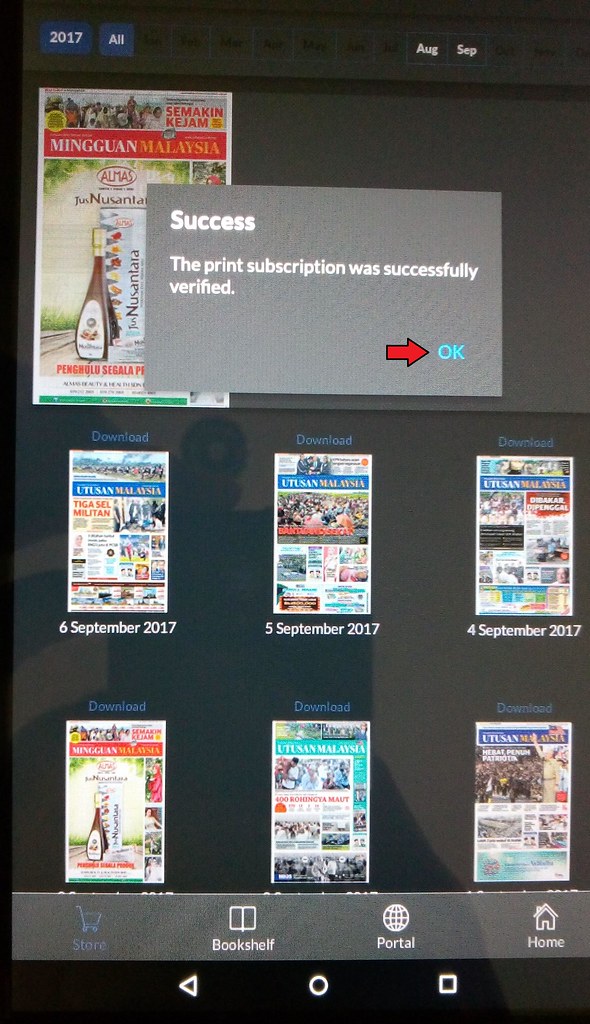 |
| 60.Click OK |
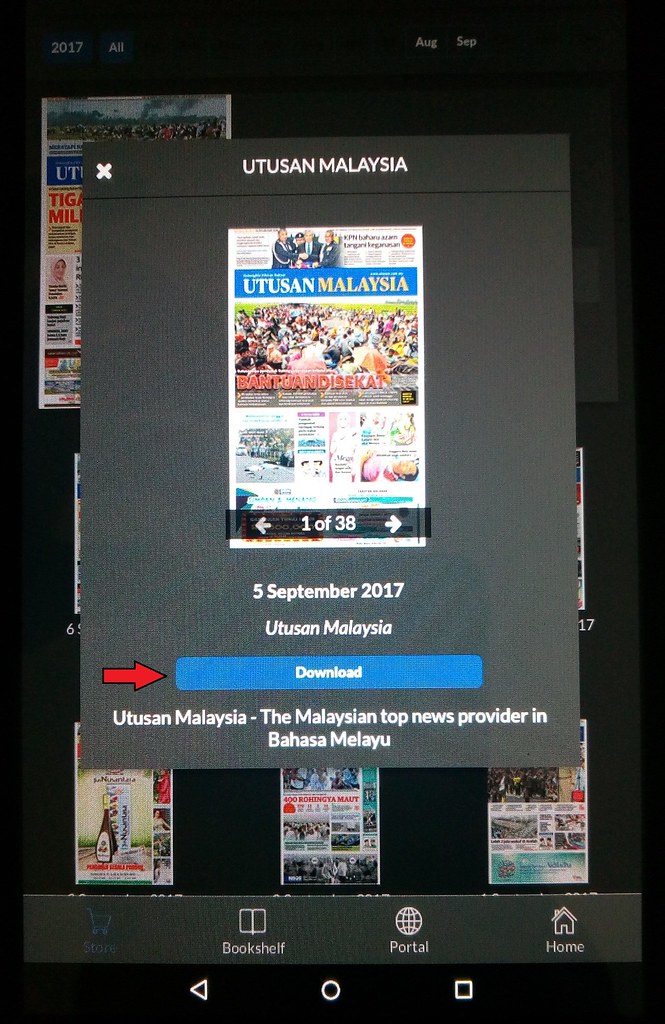 |
| 61.Click Download |
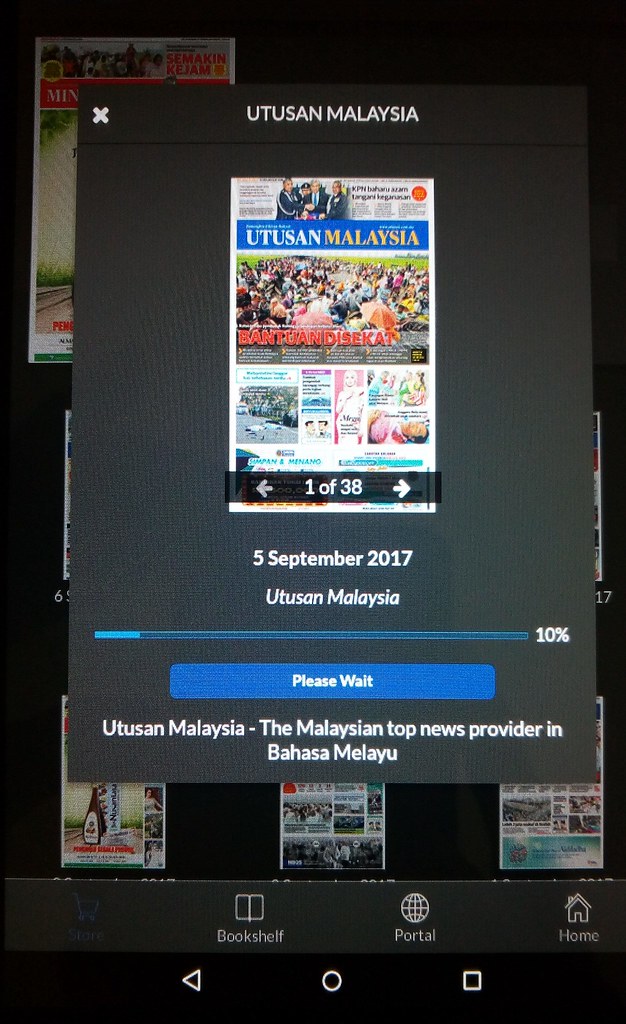 |
| and Wait |
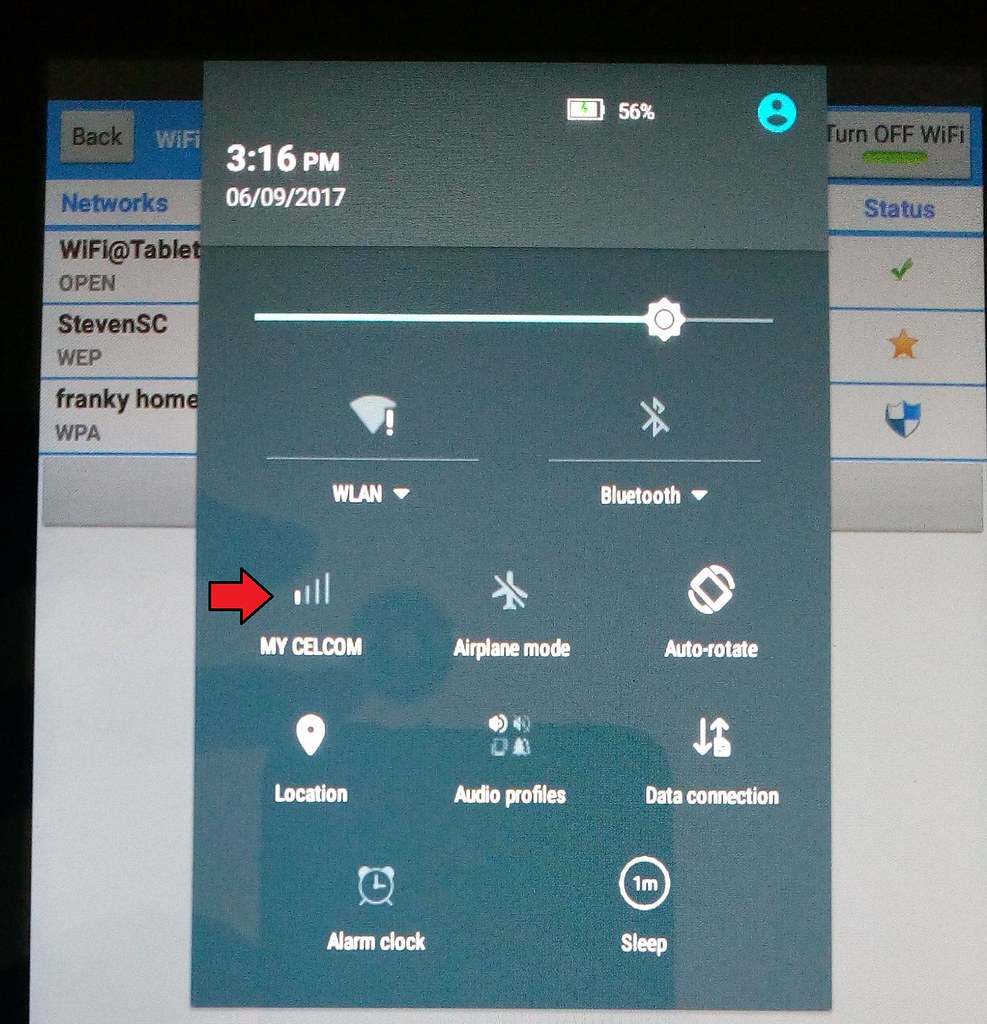 |
| 62.After 5 days getting the Tablet, you are able to use the given free data. To use it, scroll your screen down |
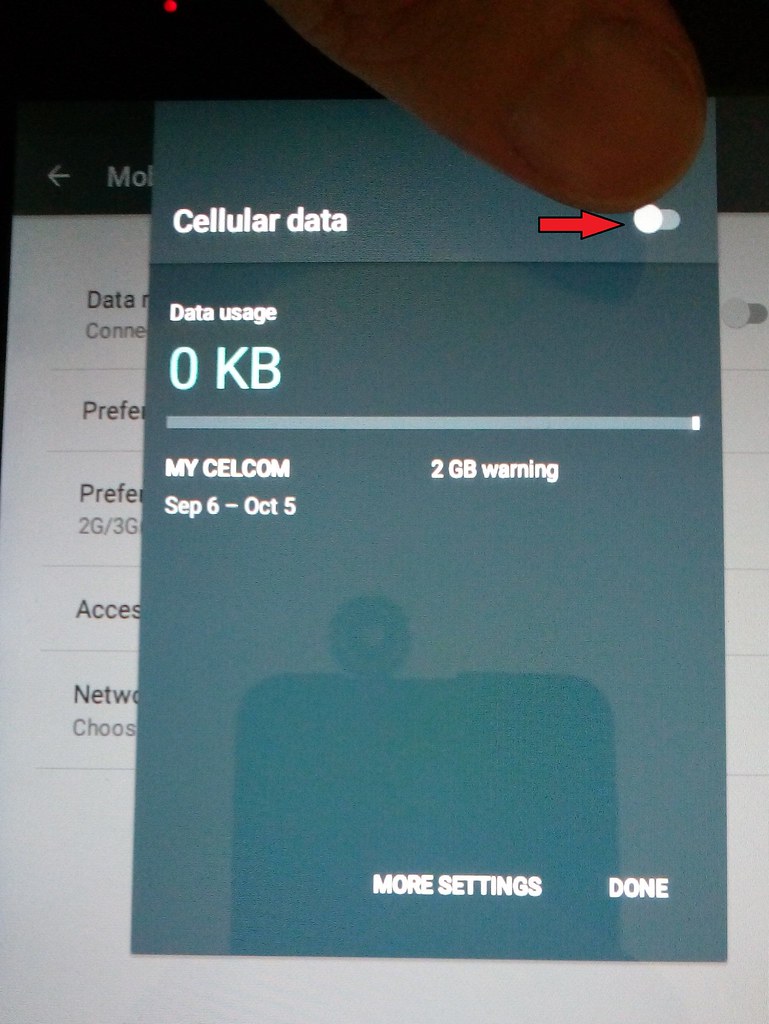 |
| 63.Click the button to switch on the data |
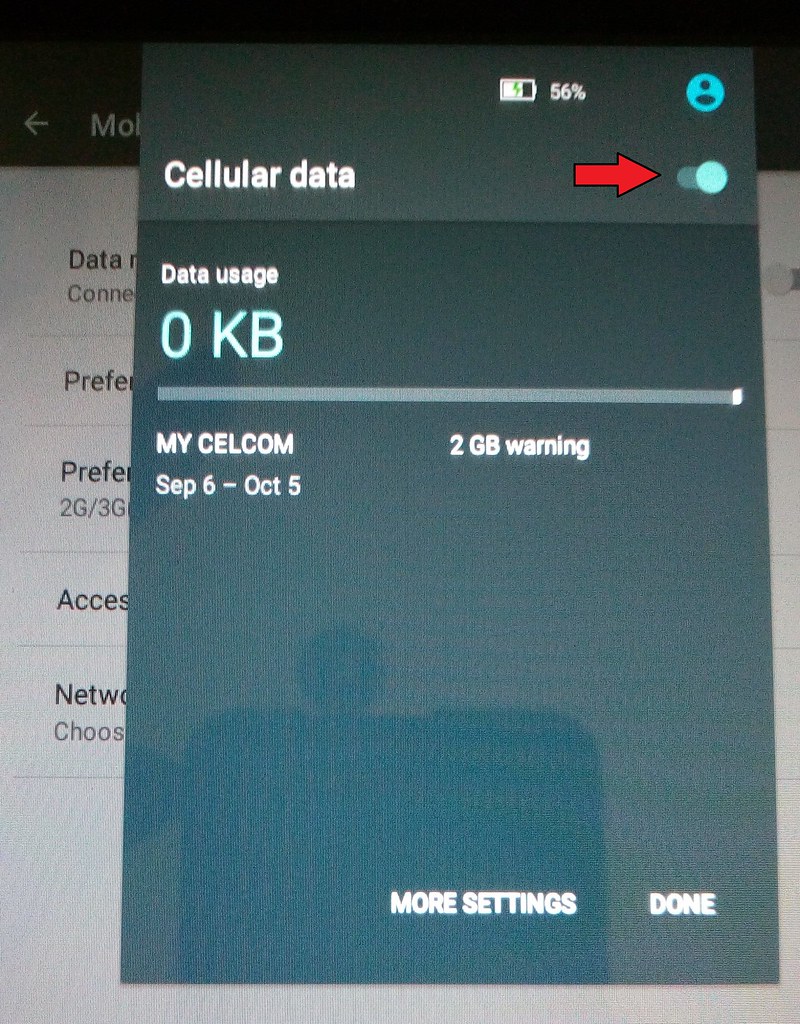 |
| 63.Click the button to switch on the data |
 |
| To use Celcom 7 days free data connection. |
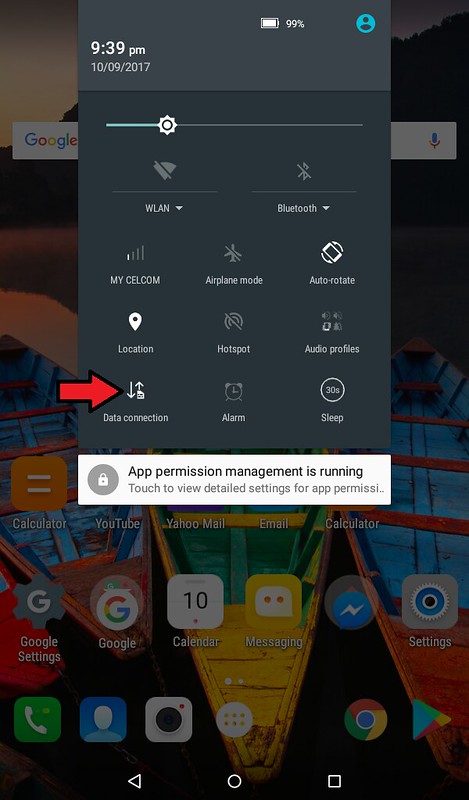 |
| 1.Make sure Data Connection is switch on |
 |
| 2.Click Settings |
 |
| 3.Click More |
|
| 3.Click More |
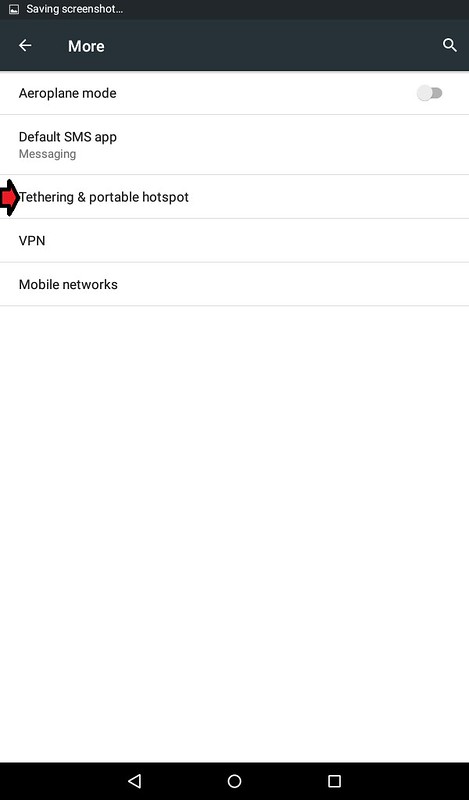 |
| 4.Click Tethering & Portable Hotspot |
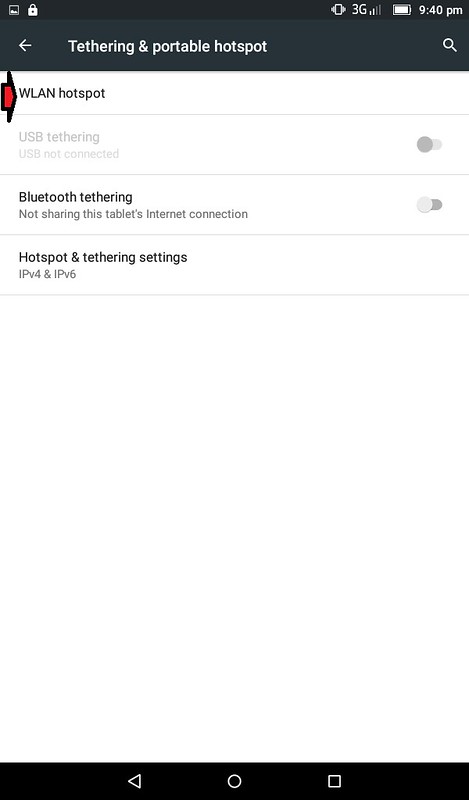 |
| 5.Click WLAN Hotspot |
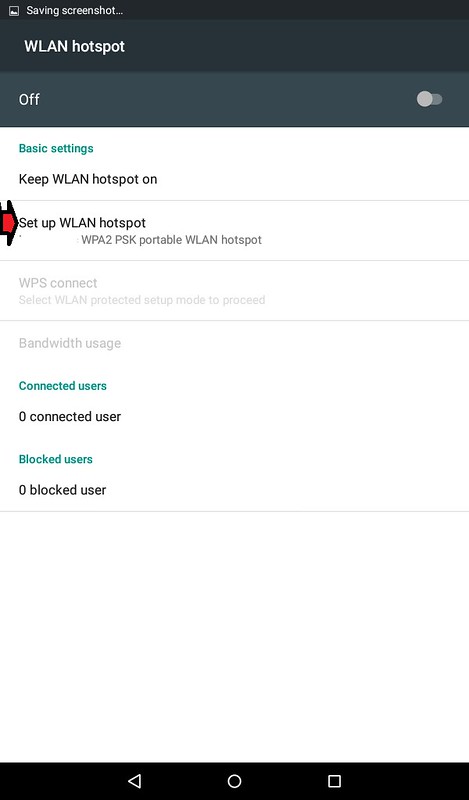 |
| 6.Click Set up WLAN Hotspot |
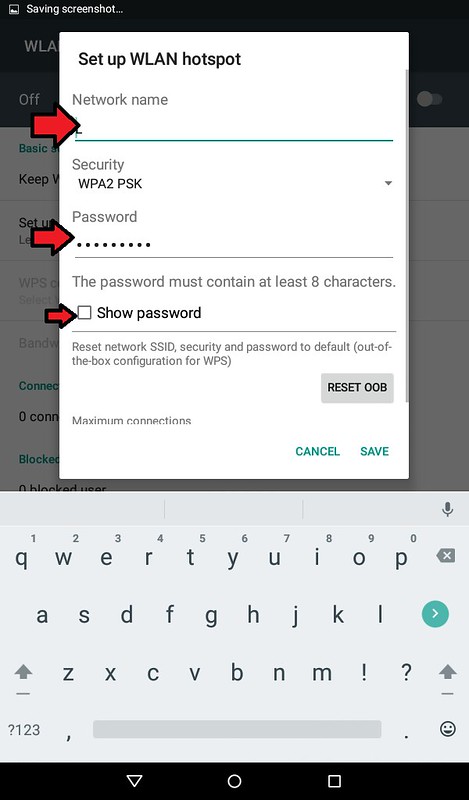 |
| 7.Key in Network Name, Password and Show Password which is simple n easy for you to connect later with your Smartphone or Computer |
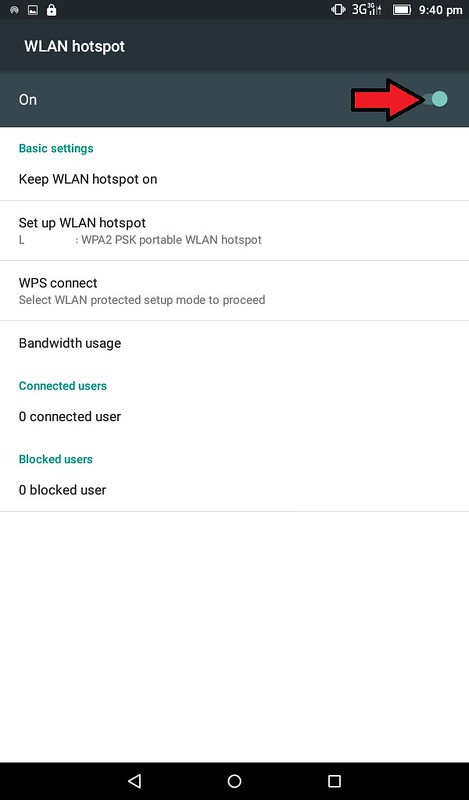 |
| 8.Click the On button |
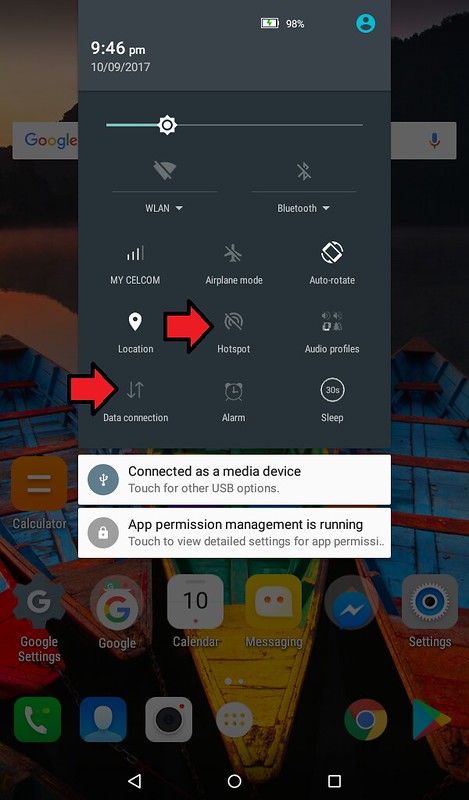 |
| 9.Make sure Data Connection and Hotspot are switched on |
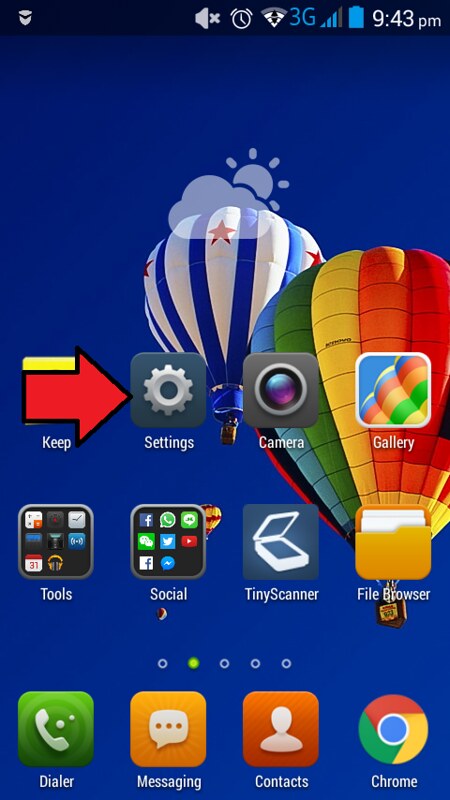 |
| 10.From your Smartphone, go to Settings |
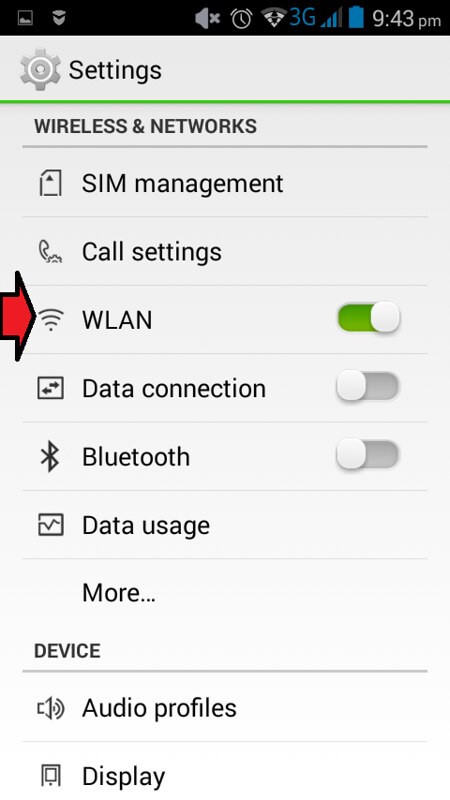 |
| 11.Click WLAN |
 |
| 12.Click the Network that you had just set up in your tablet |
 |
| 13.Key in the Password, Show Password and Connect. Now you can sure the internet for free but only 1 week |
Admin
Welcome back. Please do make a comment and vote. My comment is just personal opinion.

No comments:
Post a Comment